
Areas of responsibility, or territories is a common rule set used to automatically assign leads to dealers within Aimbase. These territories can be associated to dealers at varying levels and combinations. In this article you'll learn about how to assign those areas of responsibility to each dealer location within Aimbase.
Depending on the industry you're in, where a dealer is allowed to sell their products may be a topic of discussion. If your dealer contracts include committing an area of responsibility (or territory) to a dealer, then utilizing this functionality within Aimbase may be what you need. For more information about other methods of routing leads to dealers start here.
Getting Started
This article assumes that you have already accomplished certain steps such as creating the dealer in Aimbase. Once that is done, there are a couple of key questions you need to answer that will determine your next steps.
Is the address on the dealer correct, complete and a physical location rather than a PO Box?
All of these answers are relevant. If you do not have a value in the Address 1 field, City, State, Postal Code and Country selected for the dealer, the territory assignment feature in Aimbase could be impacted. It is also important that the physical address is used and not a PO Box. Any PO Box information should be entered into the Address 2 field. For more information on why that's relevant, read our article on the importance of clean dealer data.
Do multiple brands utilize your Aimbase install? If so, does a dealer's area of responsibility for one brand differ from another?
Within the dealer details page there is a concept of Territories, and separately, Brand Territories. If a dealer is assigned to multiple brands and you use the Territory feature for assign geographic areas to the dealer, then the dealer will be responsible for those areas for all brands. If you use the Brand Territories feature, you will have the capability to vary the areas of responsibility based on the brand carried by the dealer.
What Are Territory Hierarchies?
It may sound obvious as you read it, but the concepts are still worth mentioning. Understand how these relationships work will help you better utilize filters later on as you begin making edits and assignments.
Within the United States, there are 50 states (and Washington DC). Within each of those states are a set number of counties. In Florida for example, there are 67. Within each of those counties are specific zip code. Continuing with the Florida example, there are 48 zip codes within Lee county Florida. Zip/Postal code, county and state are the main territory types utilized for assignments. Canada follows a similar structure, but most other countries are only assigned at the country level. This means that in most cases, you should only assign 1 dealer to a foreign country.
Why does this matter?
When you are trying to assign clusters of counties or an entire state's worth of counties, filtering by state to show only county level territories is the easiest way to accomplish your goals. Each territory level has a number associated to it that is used for filtering. The association of levels to numbers are below.
US |
Canada |
Other Countries |
|
| Country | 4 | 4 | 4 |
| State/Province | 3 | 3 | |
| County/FSA | 2 | 5 | |
| Zip/Postal | 1 | 9 |
How Do Shared Territories Work?
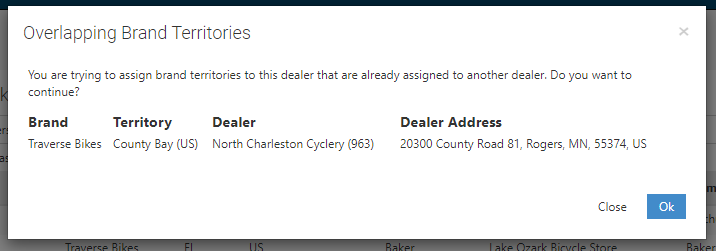
Based on this hierarchy, certain territory levels can be shared by multiple dealers. State/Province and county/FSA level territories can be assigned to more than one dealer at a time for a given brand and Aimbase will assign the lead to whichever of those dealers is closest based on the lead's zip code and the dealer's precise latitude/longitude. However, zip/postal codes should not be shared by more than one dealer. If more than one dealer is assigned to the same postal code, whichever dealer was created within Aimbase first will be assigned to the lead. If you do happen to assign the same territory to more than one dealer, whether state/province, county/FSA or zip/postal, you'll see an alert like the one below to make you aware. At this point you can determine if the overlap is intentional or in error and make the necessary adjustments from there.
How Do You Access the Territory Assignment Screens?
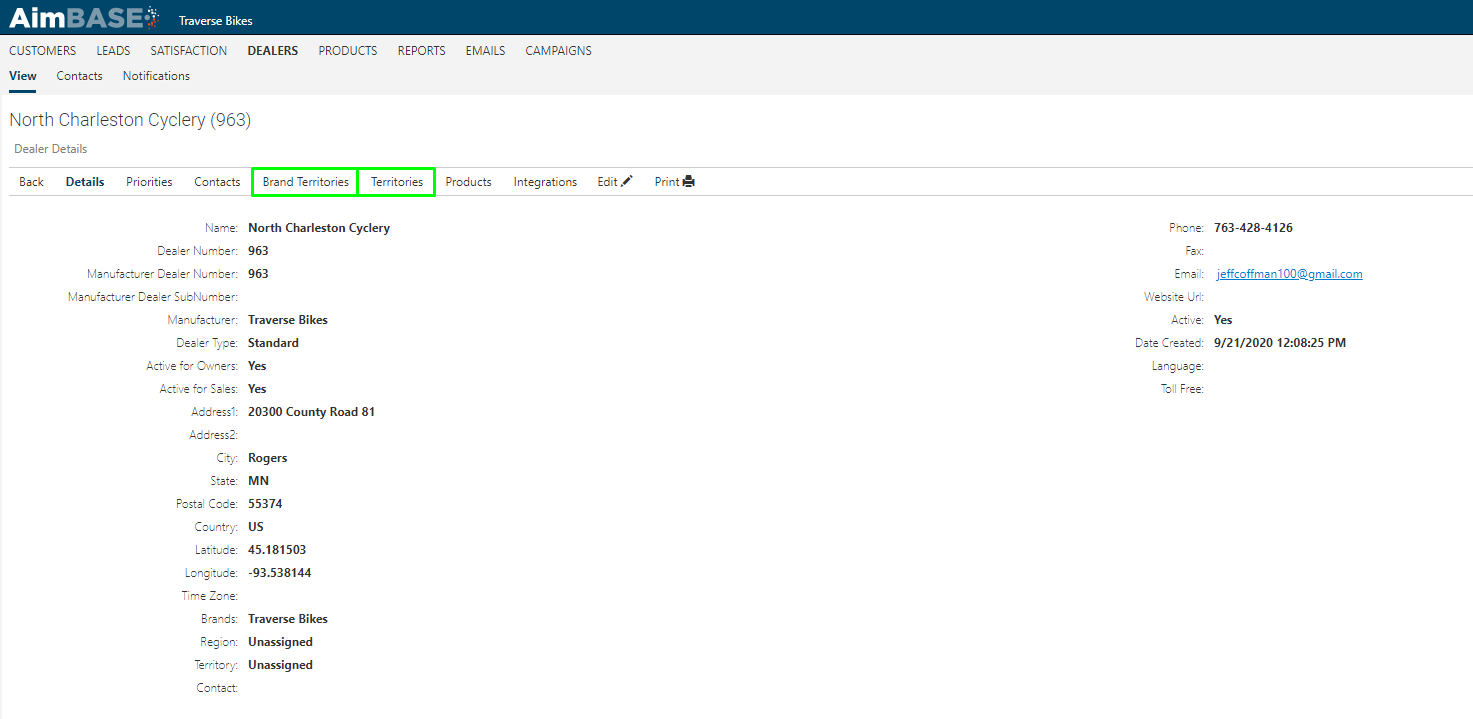
Click on the main Dealers navigation, and locate the dealer to which you'd like to make territory assignments. Click into the dealer. Click into either Brand Territories or Territories based on your brand needs.
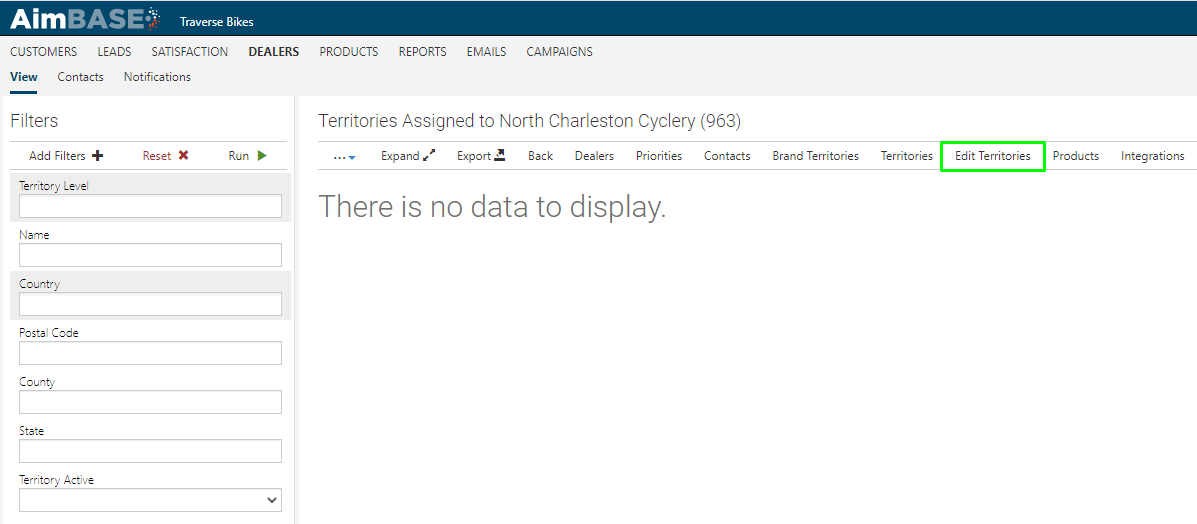
Once you've clicked into the Territories for the dealer, you'll see whichever geographic areas have already been assigned. If the dealer is new, you may see a message that says "There is no data to display." Locate the Edit button to begin making changes.
How Do You Edit/Add Areas of Responsibility?
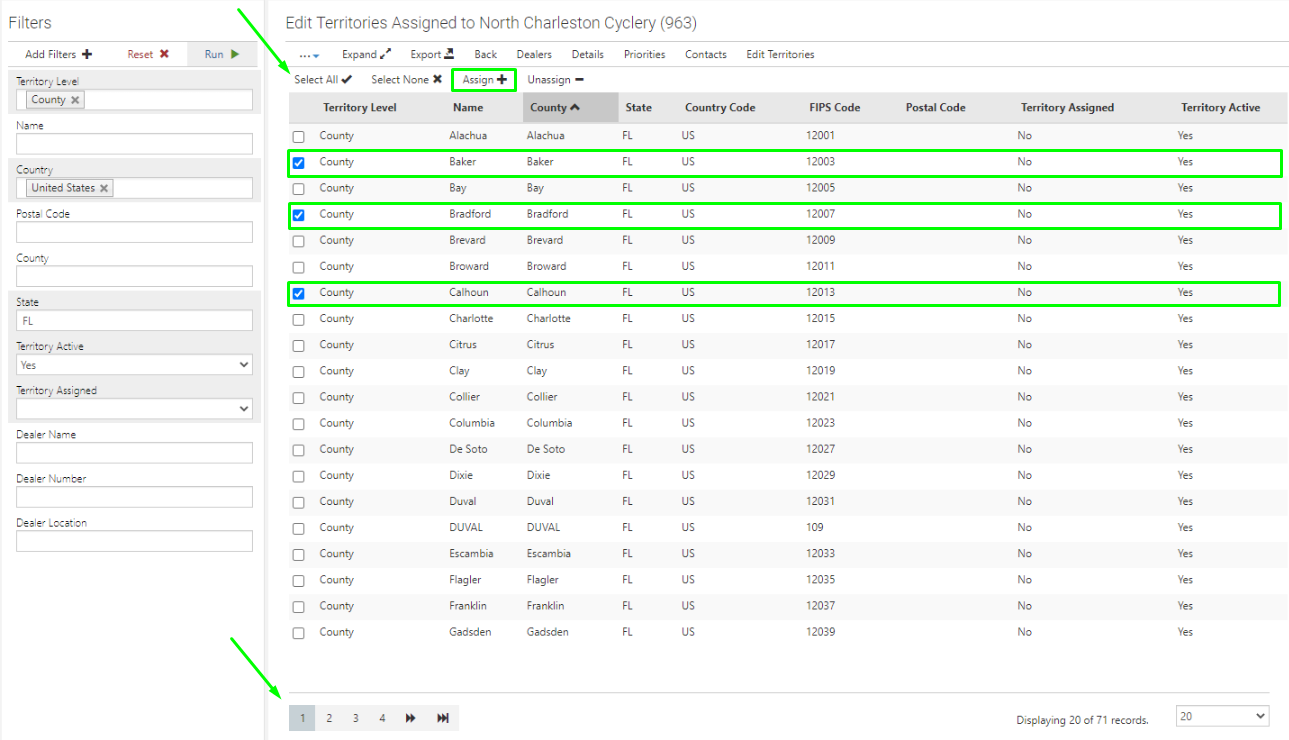
Once you're ready to make these additions and edits for a dealer, decide how you'd like to assign a set of territories to a dealer. If a contract states that a dealer gets X zip codes, but X represents all zip codes within a county, it will be easier to manage going forward if you just assign the county to the dealer instead of every zip code. To begin assigning territories (in this example, counties) configure your filters on the Edit screen as such.
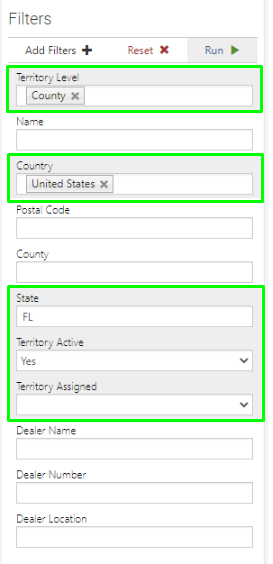
Once you've updated your filters and clicked Run, begin making your selections from the list of counties. Note, you can select individual rows by clicking the corresponding box or click the Select All button towards the top of the list. Bare in mind that if you click Select All, it will only select the territories visible on the page. You will need to click into as many pages as there are, clicking Assign before going to the next, and repeat this step.
If you're using Brand Territories, there are just a couple of tweaks to this process. In addition to the filters above, you'll want to indicate the brand for which you are assigning the territories.
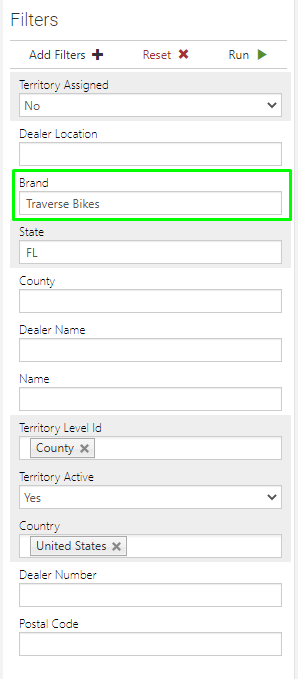
If you choose not to use the brand filter, then you'll want to be sure that you reference the added Brand column on the selection grid.

FAQs
What are “areas of responsibility” (territories) in Aimbase?
Areas of responsibility—also called territories—are rule sets used to automatically assign leads to dealers based on geographic regions. These territories can be associated with dealers at different levels and in various combinations.
Why is a dealer’s physical address important for territory assignment?
Aimbase relies on accurate dealer address data (Address 1, City, State, Postal Code, Country) to correctly assign territories. A physical address—not a PO Box—is required because incomplete or incorrect location data can negatively impact the territory assignment feature. PO Box details, if needed, should go in Address 2.
What’s the difference between “Territories” and “Brand Territories”?
If multiple brands exist in your Aimbase installation, a dealer may have different areas of responsibility by brand.
- Territories: Apply geographic areas to all brands a dealer carries.
- Brand Territories: Allow you to assign different geographic areas per brand.
How do territory hierarchies work in Aimbase?
Aimbase uses real-world geographic hierarchy structures. For example:
- A country contains states
- A state contains counties
- A county contains zip codes
The article notes that Florida has 67 counties and that one county (Lee County) contains 48 zip codes, demonstrating how these hierarchies influence filtering and assignment.
What should I verify before assigning territories to a dealer?
Before proceeding, confirm:
- The dealer record already exists
- The address is complete and physical (not a PO Box)
- You understand how the dealer's brand associations may affect territory assignment
All of these factors determine how effectively Aimbase can map areas of responsibility.
Can multiple dealers share the same territory?
Yes. Aimbase supports shared territories when necessary. The article explains that understanding how shared territories work is part of the assignment process, particularly when industries or brand arrangements require multiple dealers to cover the same geographic area.
Where do I go to edit or add areas of responsibility?
Territory assignment is managed through the designated Territory Assignment screens in Aimbase. From there, you can add, edit, or reassign geographic areas based on your dealer setup and business rules.