
What Is a Data Filter?
Data filters are used to identify a certain set of criteria which can be used to create a targeted list of individuals within the Aimbase system. Once the data filter is built it is associated to a list and from there used to access all individuals who meet the criteria set by the data filter.
Once in a list, this set of people can be used for a variety of purposes outside of Aimbase, but the most common application is for a scheduled campaign send out of Aimbase.
Important Information
Before you get started, there are a couple of details to understand about data filters and their relationships to lists.
1. If a list already exists with subscribers in it, you cannot associate a data filter to the list to incrementally add to it. If this is done, the people who meet the criteria of the data filter will instead overwrite and replace the subscribers originally on the list.
2. Data filters do not automatically place people in a list. While a data filter will remain associated to a list as long as no edits to the list are made to remove it. the list must be manually refreshed ahead of scheduling an email to campaign. This step is taken to ensure the most current set of data dictated by the criteria on the data filter is present on the list.
3. When refreshing a list associated to a data filter, people who were previously on the list, or people who previously met the criteria of the data filter, may be removed from the list if they no long meet the necessary criteria.
How to Create
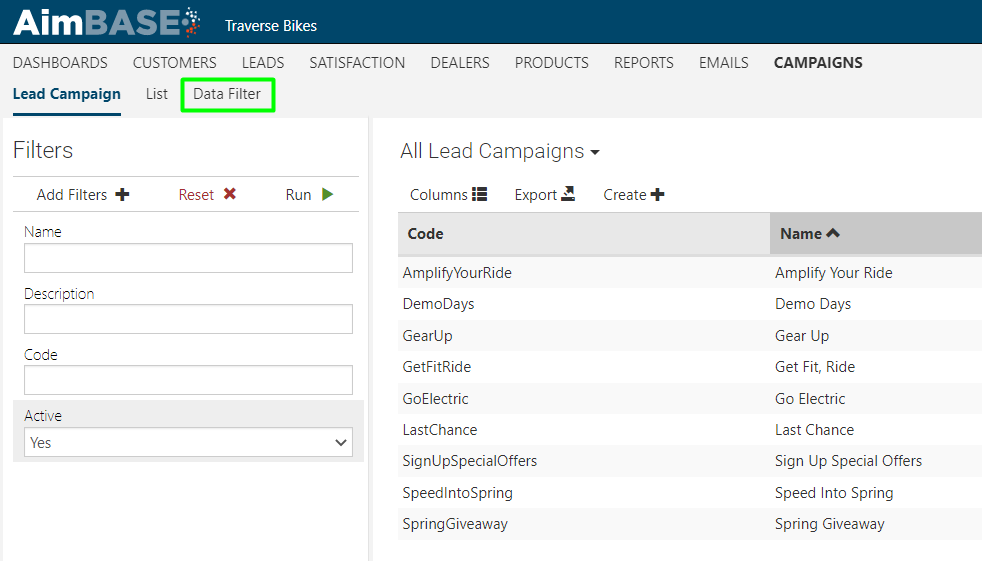
1. Click the “Campaigns” main navigation option.
2. Click “Data Filter” secondary navigation option.
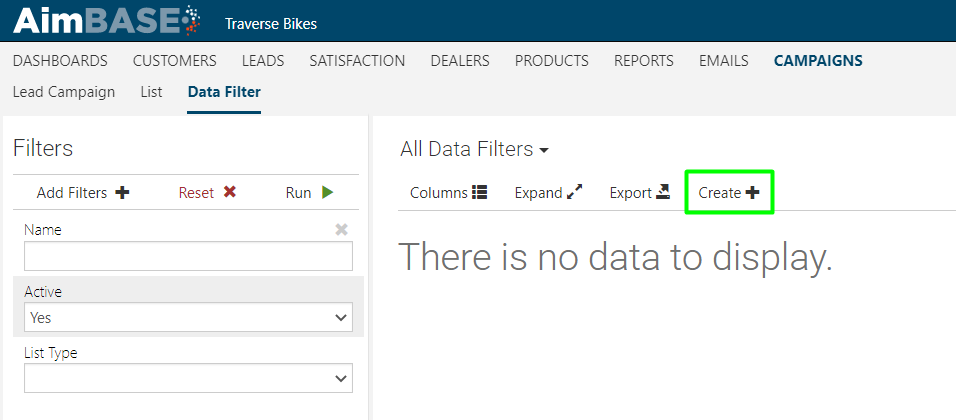
3. Click “Create +” to start a new data filter
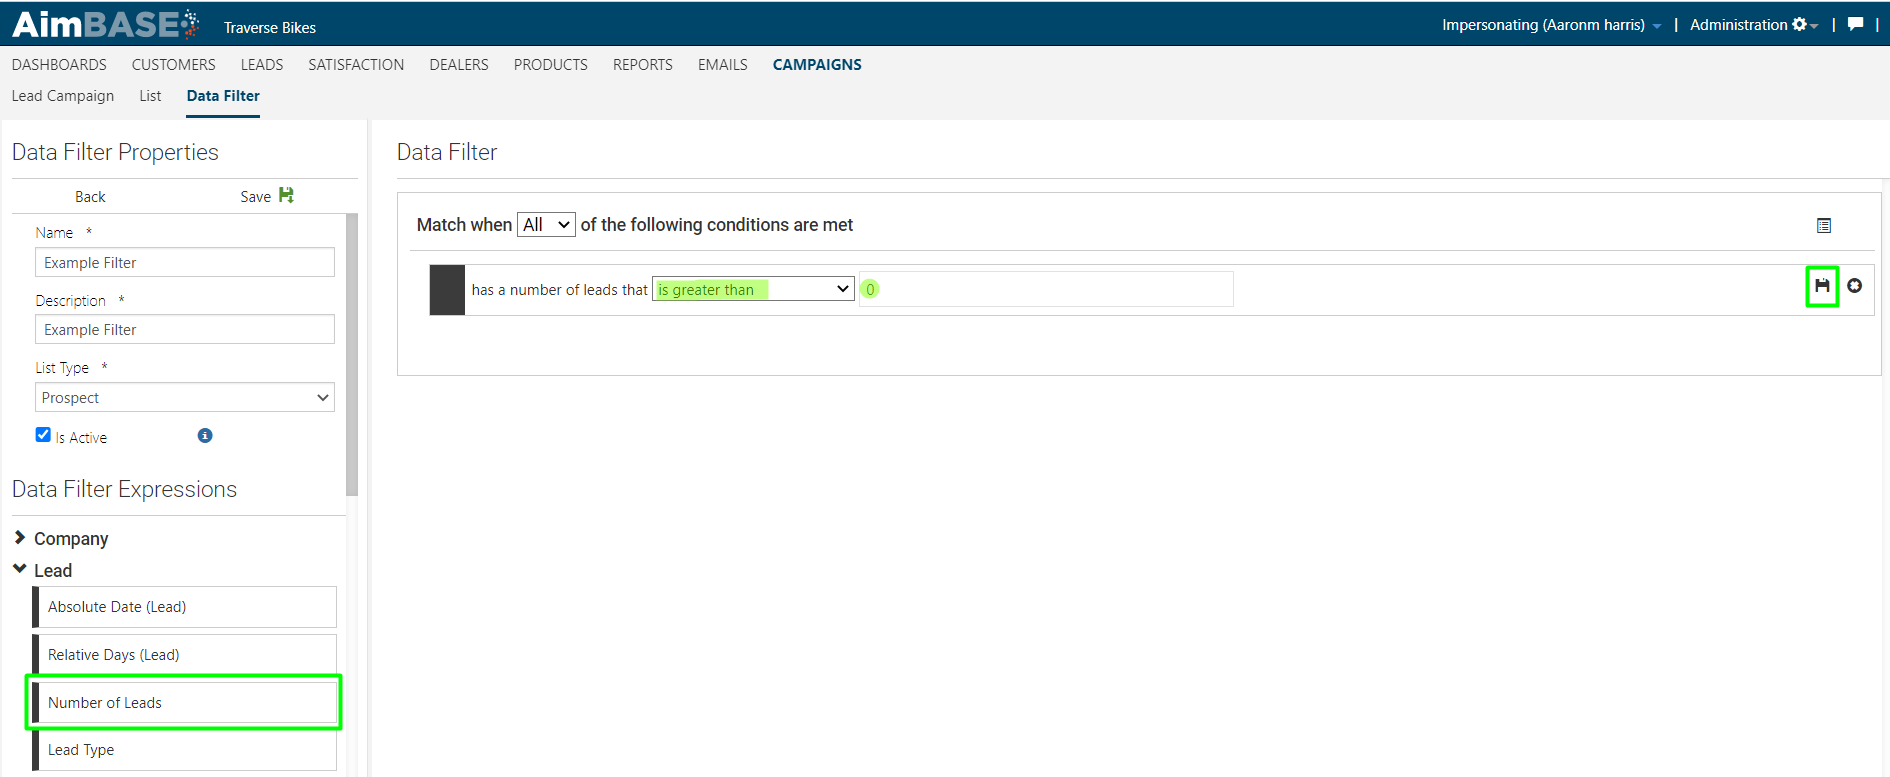
4. In the Data Filter Properties section, create a Name and Description for your data filter.
5. Select a List Type to target for your criteria. Different data types have different variables available for targeting.
If you want to send an email campaign to leads, choose Prospect from the list. If you want to send a campaign to registered owners, select Owners from the list.
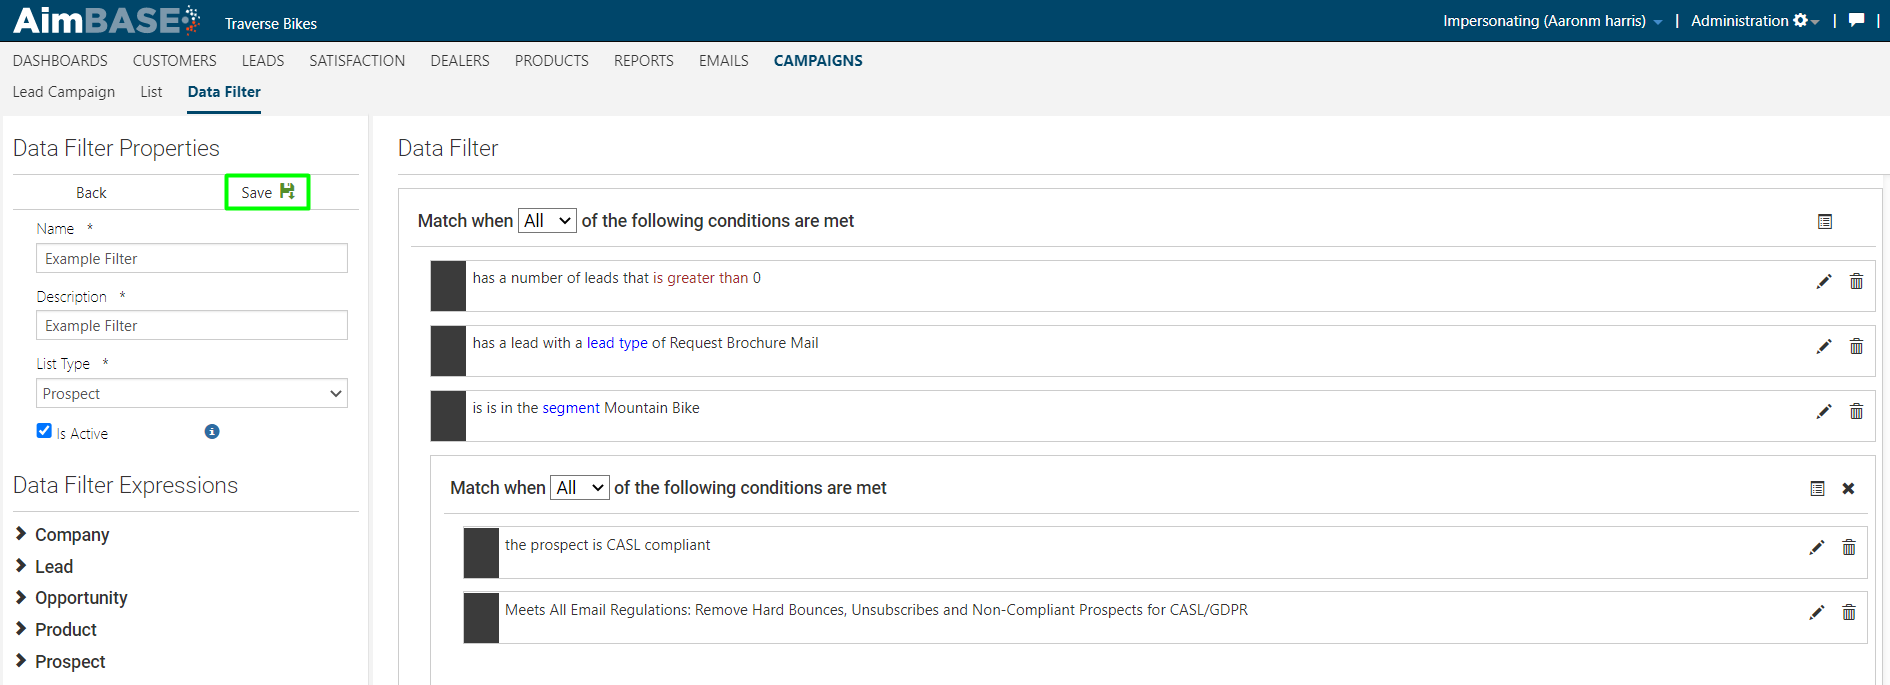
6. Change the Droplist selection from “Any” to “All” for the brand level for this example, since we want all conditions to be met.
- All = all conditions must be met in order to return results
- Any = any of the conditions must be met in order to return results

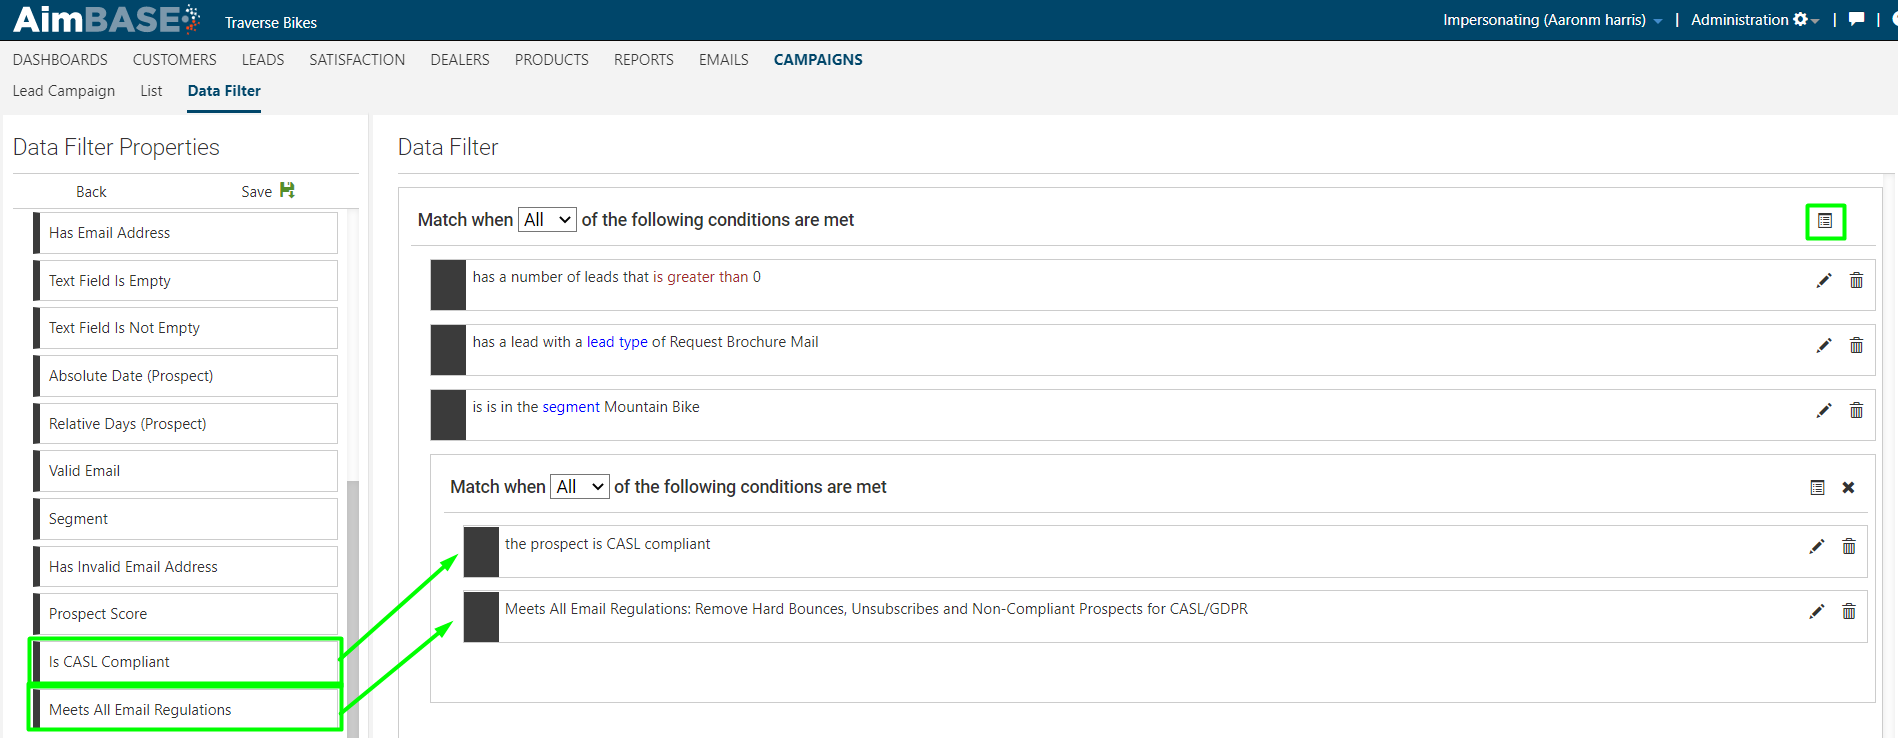
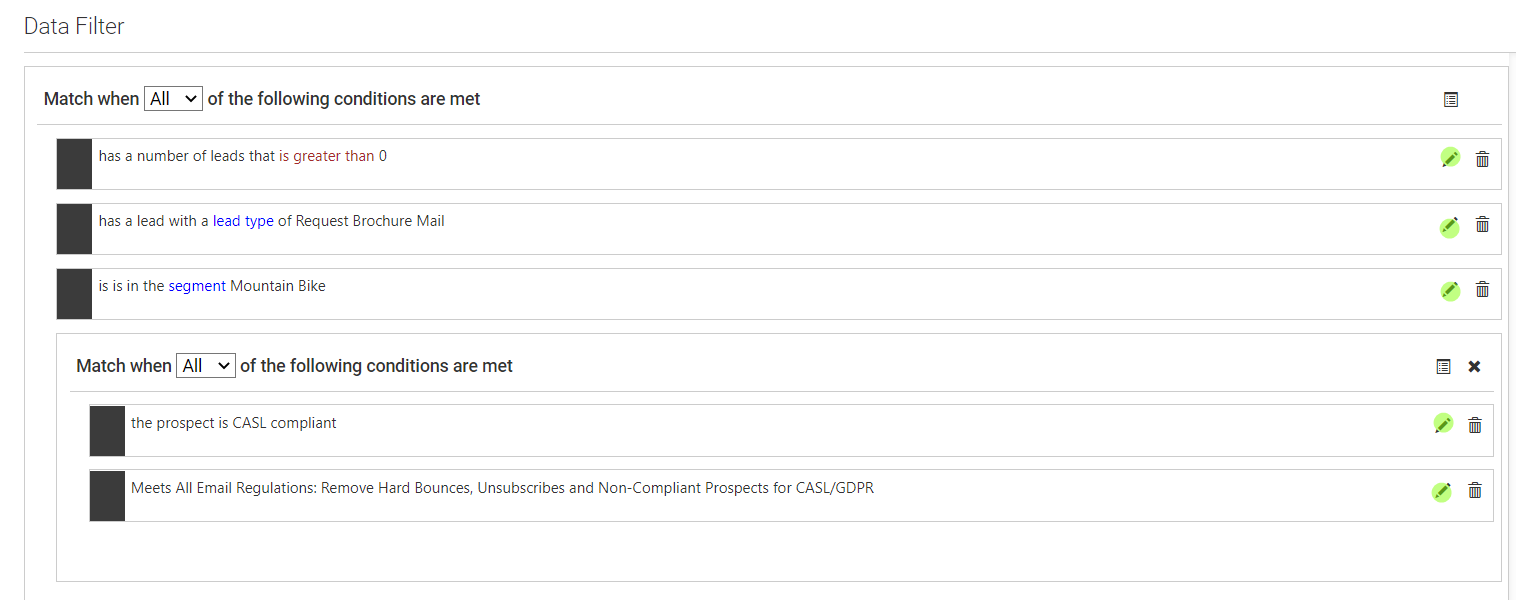
7. Begin dragging your criteria into the Data Filter portion of the screen.
You can add as many of these are you need to identify as narrow or broad an audience as is necessary. You can also choose variables from other Data Filter Expressions within your selected list type as is show below with the addition from the Prospect. 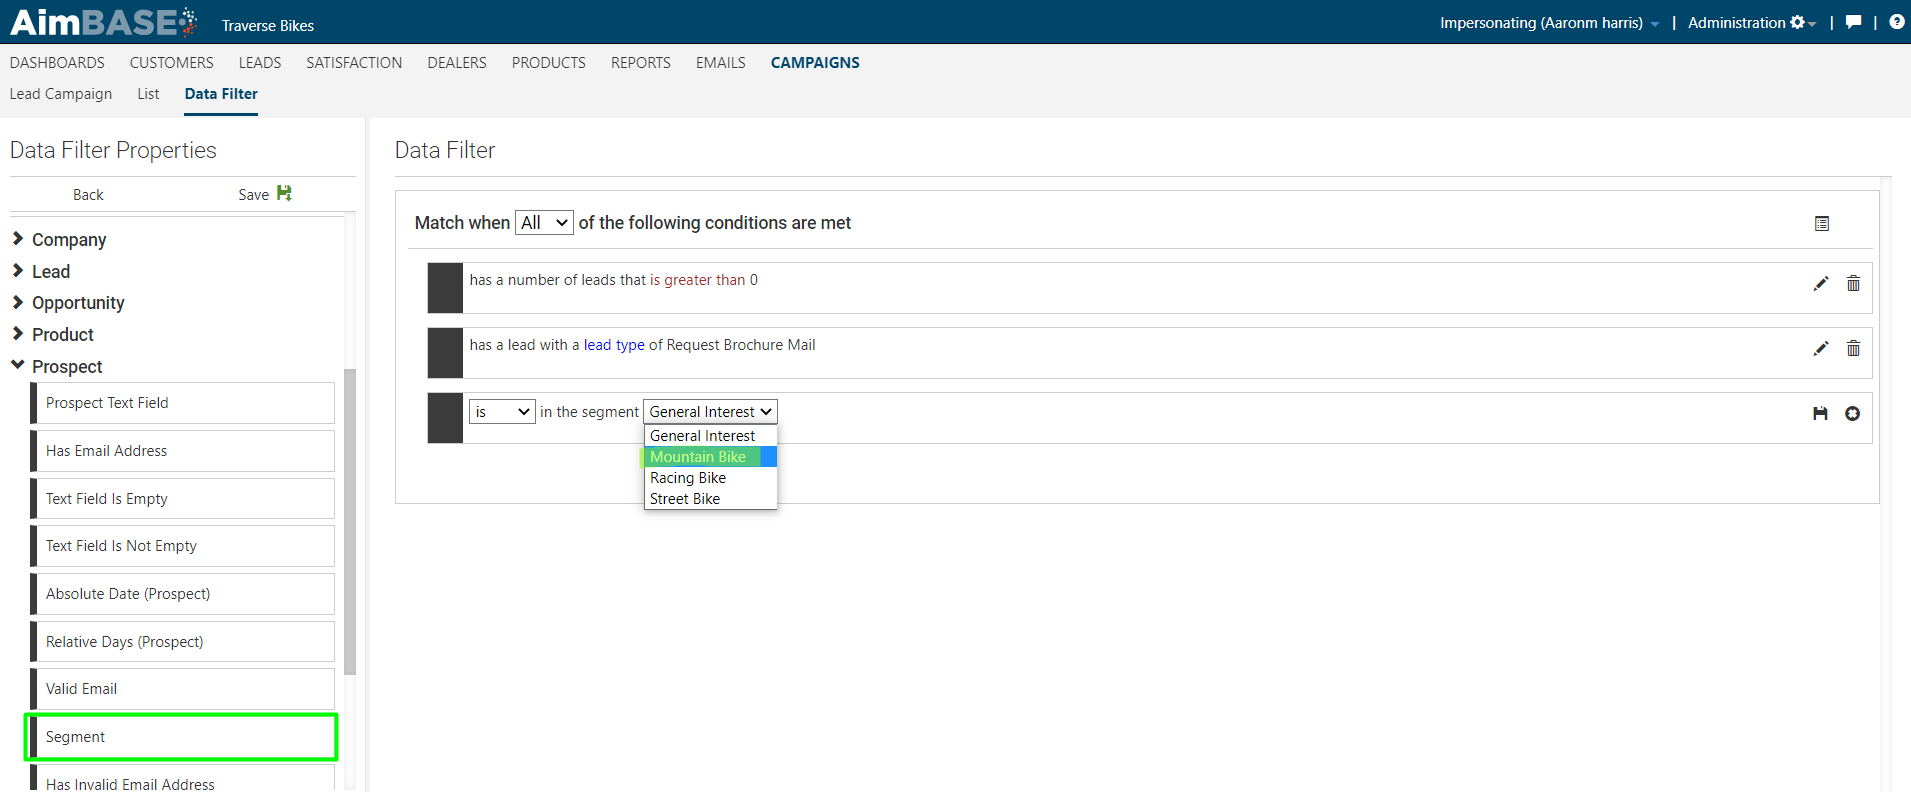
You can also create sub groupings of criteria by clicking the Add Group icon in the top-right corner of the screen.
8. Ensure all of your selections have been saved by clicking the Save icon on each row. You can be sure this step has been taken if/when all icons reflect the Edit icon instead of the Save.
9. Click Save on the Data Filter.