
Summary
Lists are necessary for sending email campaigns. Lists are created through the Aimbase user interface, and can be populated with subscribers a number of different ways. This article will explain the ways in which a subscriber can end up on a list, how to create a list, and how to set up the mechanisms within the system controlled by the user that can add people to a list.
What are the ways a subscriber can end up on a list?
1. Lead API - Through this method a prospect's information is added to a list at the same time as a lead is submitted. If this method is being used, then there is typically an additional checkbox on the lead form that explicitly states that the prospect is opting in to a marketing list.
2. Subscriber Service API - Being added to a list via the Subscriber Service API implies that the prospect opted in from a specific "newsletter" opt-in form from your site. If the person opted in from a form like this, there will not always be a lead for that prospect within Aimbase.
3. Manual upload - Through this method you can use a CSV file from Excel to import your subscribers into a list.
4. Data filter - Data filters are found within Aimbase under the Campaigns tab. Data filters allow users to create customized, complex filters based on different types of data within Aimbase (leads, prospects, owners). By creating a data filter, you can then pull that sub set of data into your list and send emails to them. When using Data filters, you should remember to regularly 'refresh' your list. Follow these steps to do that action: Updating a List that Uses a Data Filter
How do you create a list?
Before you send an email, you need to have your audience picked out. During the send process, you can easily select multiple lists and decide on exclusion lists. You do not need to have your final audience all in one list, but you do need to have all components of your lists uploaded before sending to them.
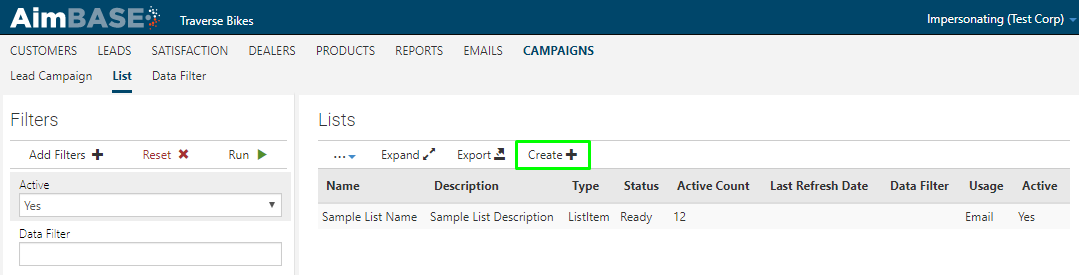
1. To create your list, click Campaigns and then Lists.

2. Click 'Create+'
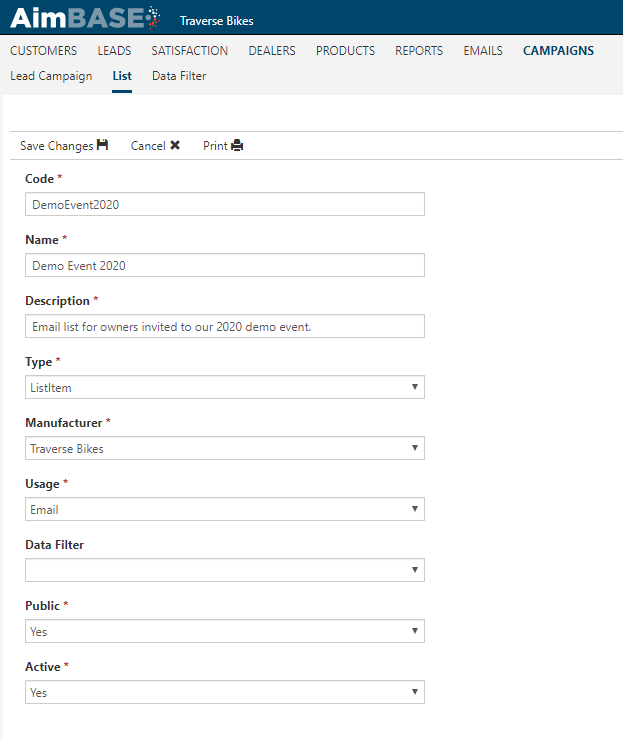
3. Fill in each field with as accurate a set of information as possible.
Code: This is the unique identifier for your list. We recommend that once you create your list you do not alter this code in any way.
Name: This is the name for your list. Make this as descriptive as possible, as you will be locating your list by this name during setup.
Description: Describe your list.
Type: If you are emailing to the list, you will always choose 'List Item' as the type. Choosing the type 'Owner' or 'Prospect' means you will be importing your list from previously created data filters in the 'Data Filter' field.
Manufacturer: Select the manufacturer you wish to create the new list.
Usage: If you are emailing to this list, select 'Email' here. This will ensure that your list does not have duplicate emails in it. Below are the 3 Usage options.
- Email - All of the unique list items by email ID are added when a list ID is created with email usage. When refreshed it will also check and add all of the unique emails if not present. These lists are primarily utilized for sending emails or campaigns.
- Mail - When a list item is created with mail usage, all unique Address 1 and Address 2, City, State, Postal Code, and Country Code combinations are added. When the list item is refreshed, it also checks to see if all unique Address 1 and Address 2, City, State, Postal Code, and Country Code combinations and adds all of them. Sending mail is the main use for these lists.
- Data - When a list item is created with Data, it will collect all the data regardless of any unique email or address.
Data Filter: This can be left blank unless you are using a data filter. If this is the case, select the data filter name here, but remember that your 'Type' field must be set to 'Owner' or 'Prospect' for the data filter to work.
Public: A list being used for campaign sends should be set to 'Yes'.
Active: To use the list, active must be set to 'Yes'. If you are done with the list and would no longer like to see it as an option, simply change this to 'No'.
Once you're done filling in the information, click 'Save Changes'. Example shown below:
Watch the List Creation Video:
How do you import list members?
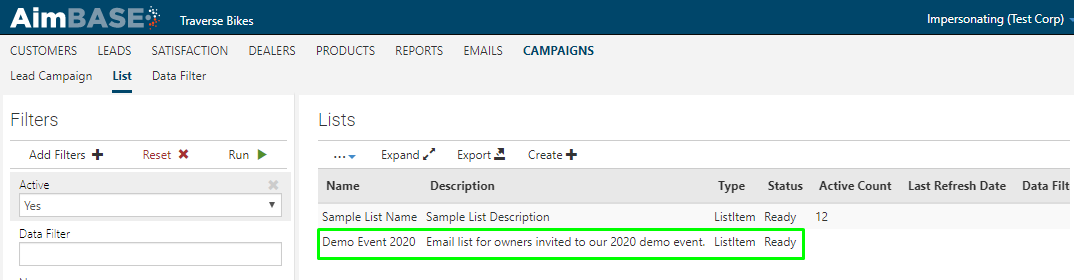
1. Locate the list you want to add the subscribers to in Aimbase.
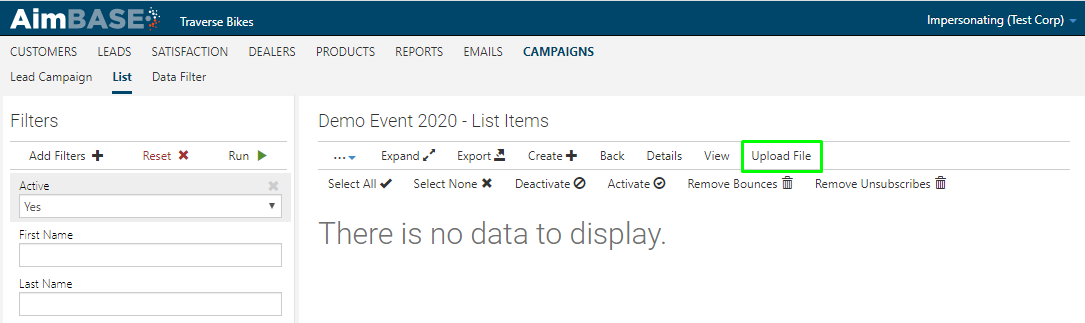
2. Select 'Upload File'.
3. Prepare your CSV with your list members or subscribers.
Note the required fields below. Because you clicked 'Upload File' form within the list you are adding to, you will not need the 'List Codes' in your file.
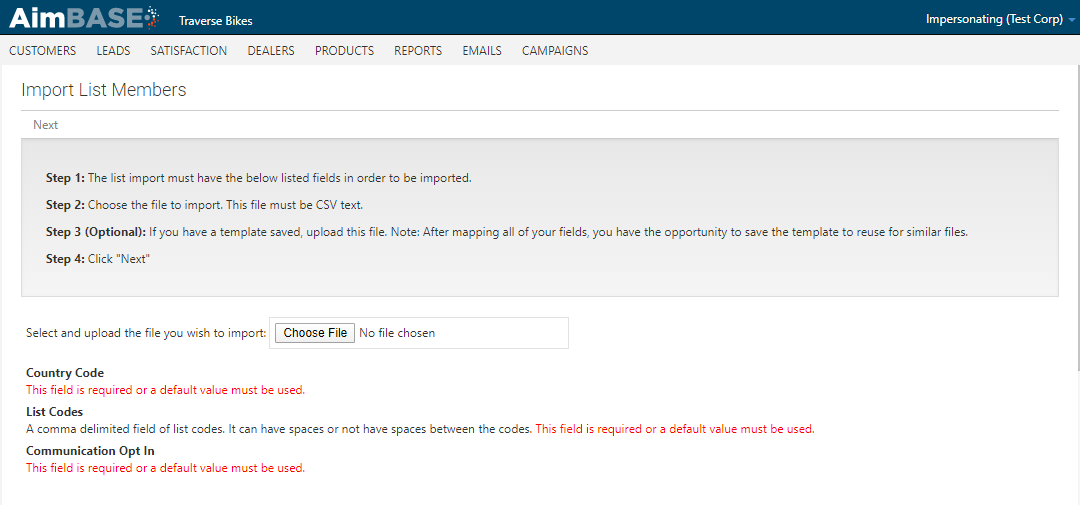
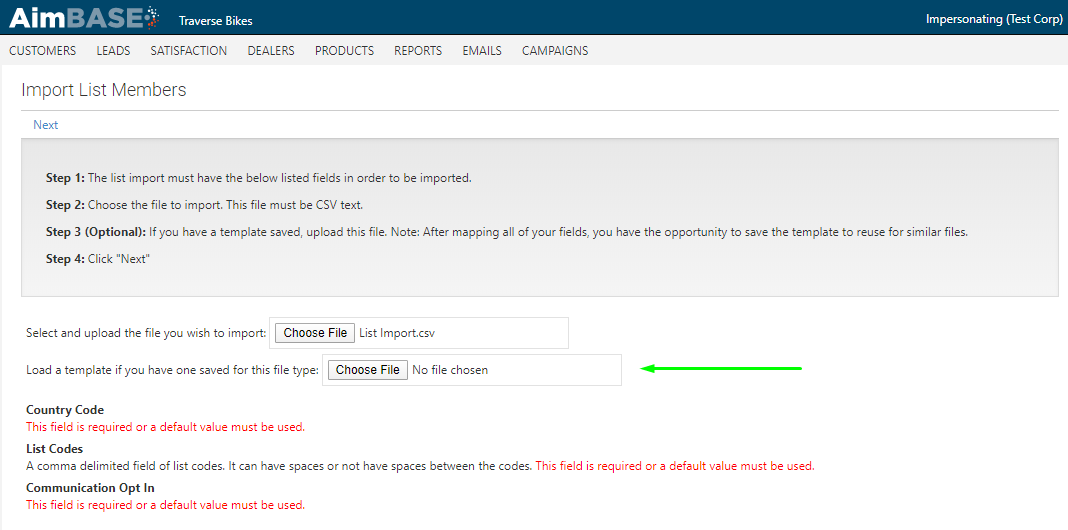
4. Select your list to import using 'Choose File'; remember, it must be a CSV. (When this is pulled in, the import tool will also ask for a template. Most of the time users do not have a template, and it isn't necessary to have one. A template simply allows you to save all of the information you're about to do in steps 5 and 6 so that you can skip making all of those selections next time. Templates only work if you're importing to the exact same list over and over again.)
Click 'Next'.
5. On the next page a preview of your data will be rendered on the screen. You'll notice that Aimbase will attempt to read your file and match your columns to fields within Aimbase. In blue you'll see an example of a column header that matched the Aimbase field name perfectly. In pink is an example of a column header that didn't match. Confirm that all of the automatic matches are how you want them to be, and select the correct Aimbase field name from the top row dropdowns for the rest.
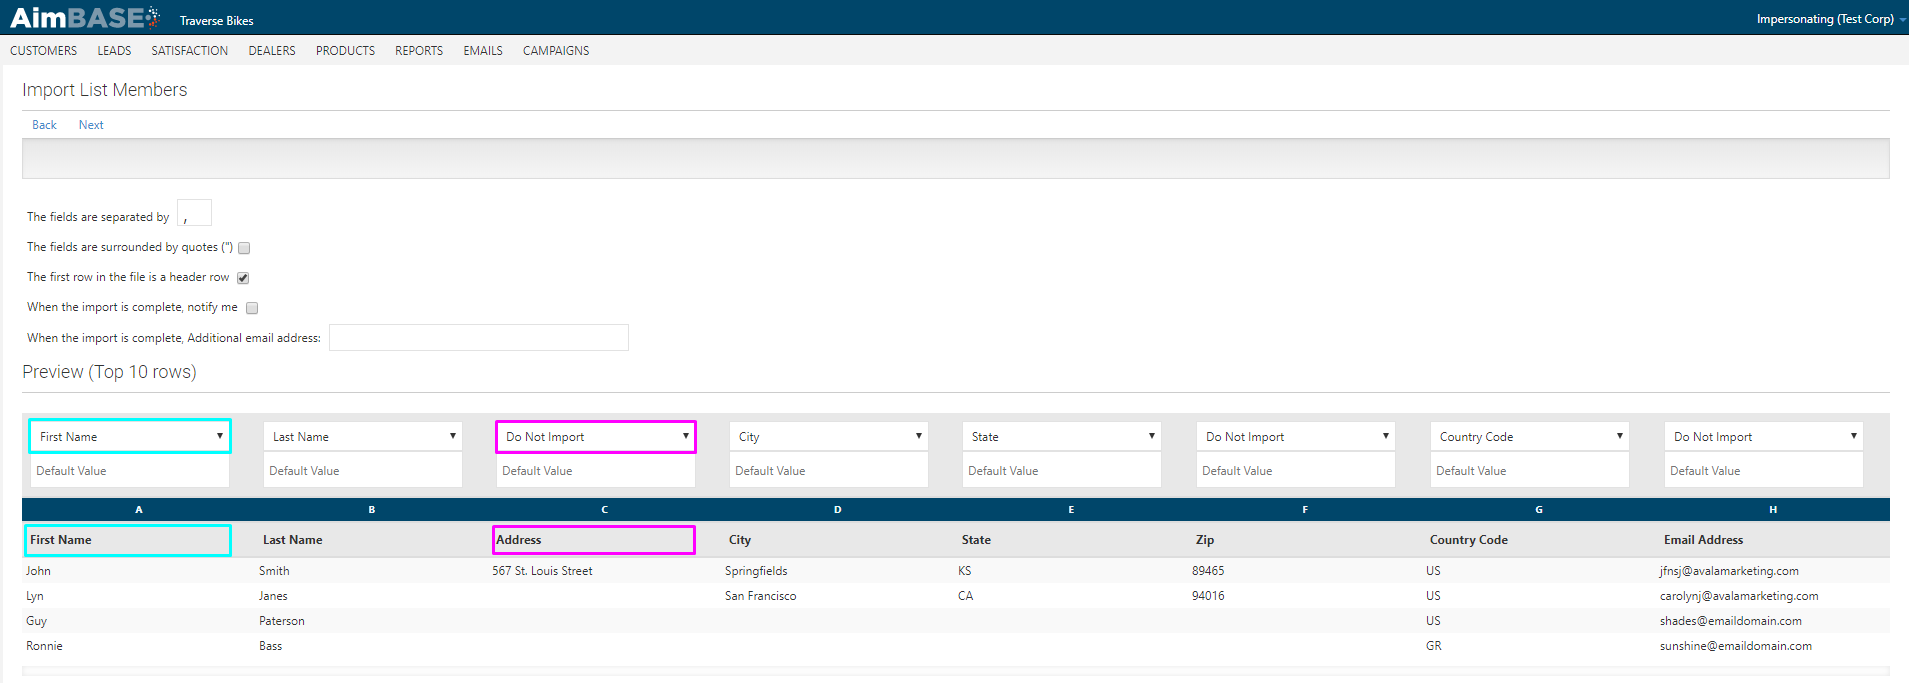
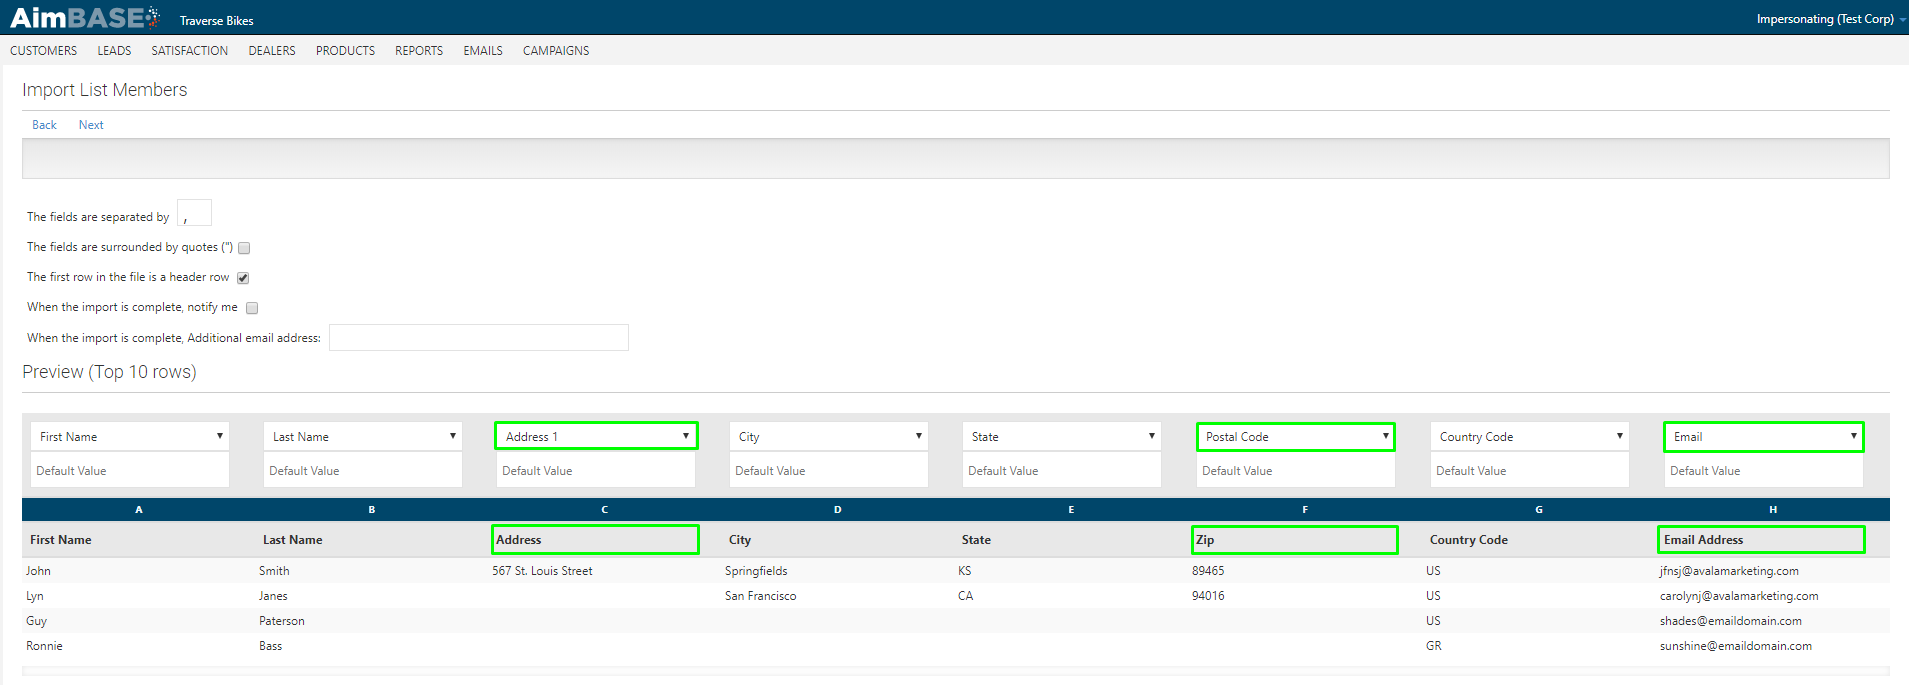
Below is the completed mapping. If there is a column in your file that you don't want to import, leave the value in the dropdown as 'Do not import'. Click 'Next'.
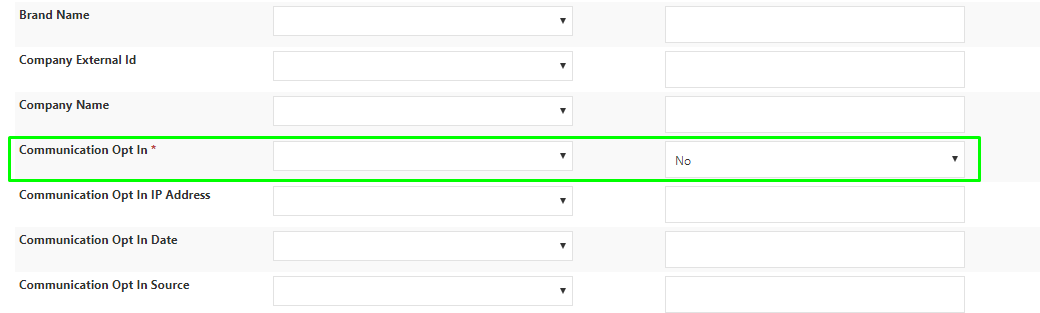
6. On the next page you'll see the rest of the fields within Aimbase that you could associate to each subscriber. The only other field on this page that should be required is the 'Communication Opt In' field.
Unless you also know the Communication Opt In IP Address, Communication Opt In Date, and Communication Opt In Source for each subscriber on your list, choose No for the 'Communication Opt In' field.
'Communication Opt In' is required because it is used for Aimbase's email compliance logic. When the list member is marked as communication opted in and the country code is anything other than US, the communication opt in date, source, and IP address must be provided for your list to be compliant with email regulations outside of the US.
Because my list has a subscriber with a country code of GR, I'm choosing 'No' for the Communication Opt In' field. By choosing 'No', Aimbase will know to ignore my international subscriber, but will still send emails as usual to the subscribers with US country codes.
7. Click 'Import'.

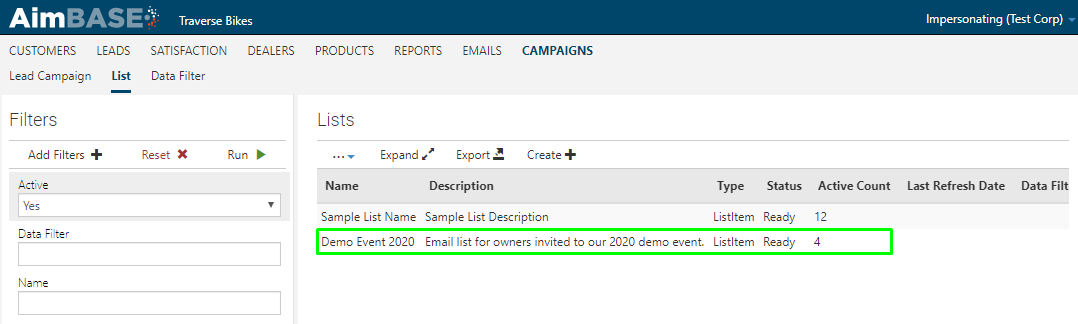
8. Navigate back to the 'List' page under 'Campaigns'
Here you'll find that the list has completed the import process, and there are 4 subscribers in the list.
By clicking into the list you'll see each subscriber from the CSV that was imported. Notice that the first subscriber on the list has a 'Bounce Status' of 'Hard Bounce'. This indicates that this subscriber already exists someplace within Aimbase, and the system recognizes that previous email sends to this address have not been delivered.
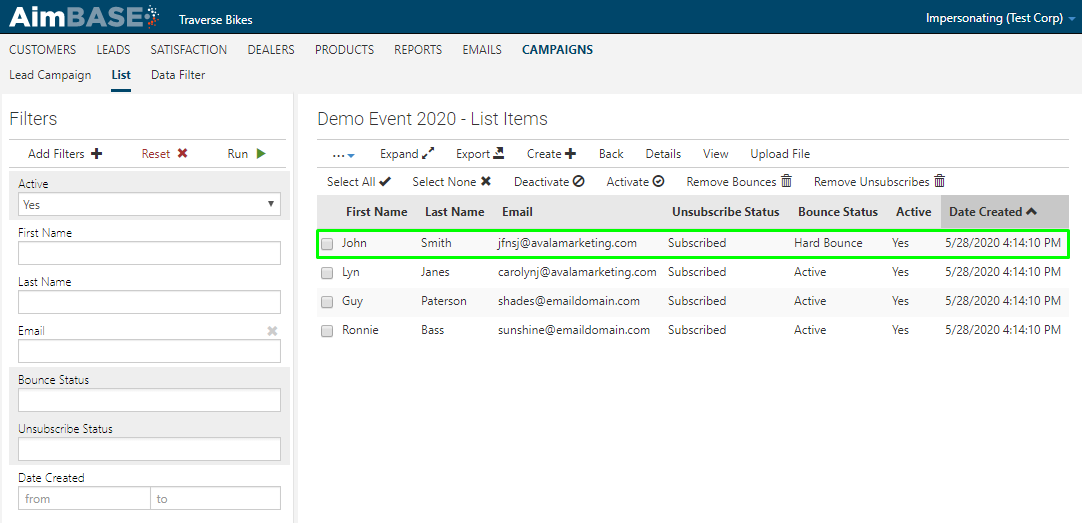
This information is tracked system-wide for each email address, and Aimbase will cease sending to certain email addresses once it detects that it is no longer a good address. This is done in an effort to maintain your sender reputation and ensure that as many of your emails are delivered to good email addresses as possible.
Watch the List Import Video
How do you create data filters for lists?


What Is a Data Filter?
Data filters are used to identify a certain set of criteria which can be used to create a targeted list of individuals within the Aimbase system. Once the data filter is built it is associated to a list and from there used to access all individuals who meet the criteria set by the data filter.
Once in a list, this set of people can be used for a variety of purposes outside of Aimbase, but the most common application is for a scheduled campaign send out of Aimbase.
Important Information
Before you get started, there are a couple of details to understand about data filters and their relationships to lists.
1. If a list already exists with subscribers in it, you cannot associate a data filter to the list to incrementally add to it. If this is done, the people who meet the criteria of the data filter will instead overwrite and replace the subscribers originally on the list.
2. Data filters do not automatically place people in a list. While a data filter will remain associated to a list as long as no edits to the list are made to remove it. the list must be manually refreshed ahead of scheduling an email to campaign. This step is taken to ensure the most current set of data dictated by the criteria on the data filter is present on the list.
3. When refreshing a list associated to a data filter, people who were previously on the list, or people who previously met the criteria of the data filter, may be removed from the list if they no long meet the necessary criteria.
How to Create
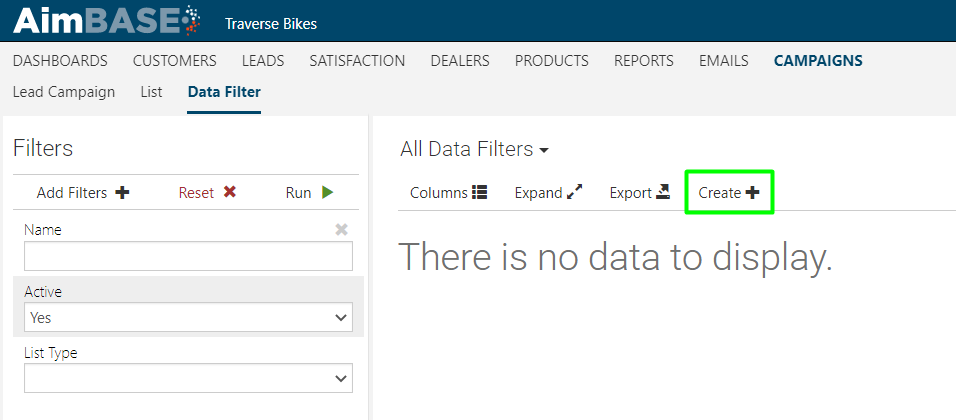
1. Click the “Campaigns” main navigation option.
2. Click “Data Filter” secondary navigation option.
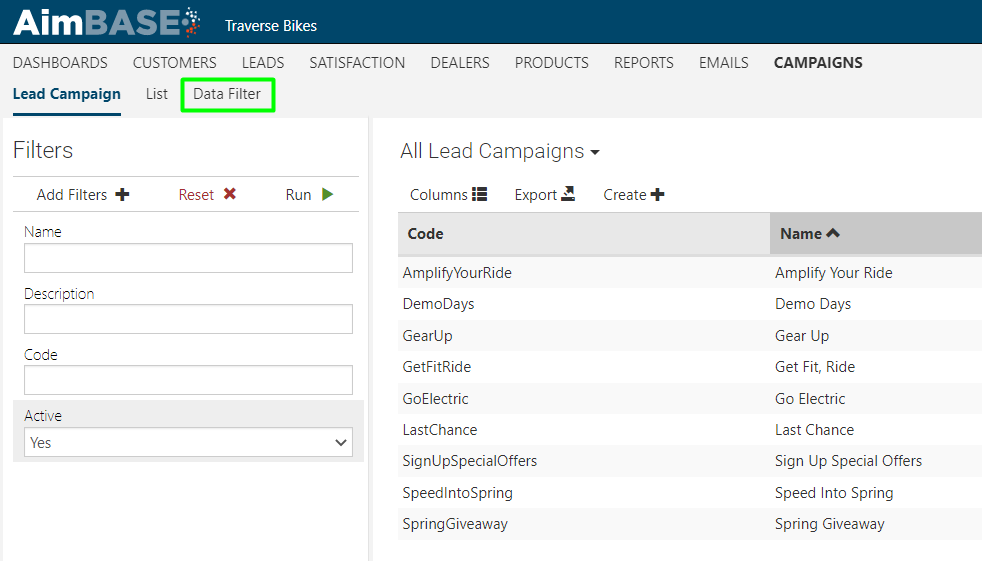
3. Click “Create +” to start a new data filter
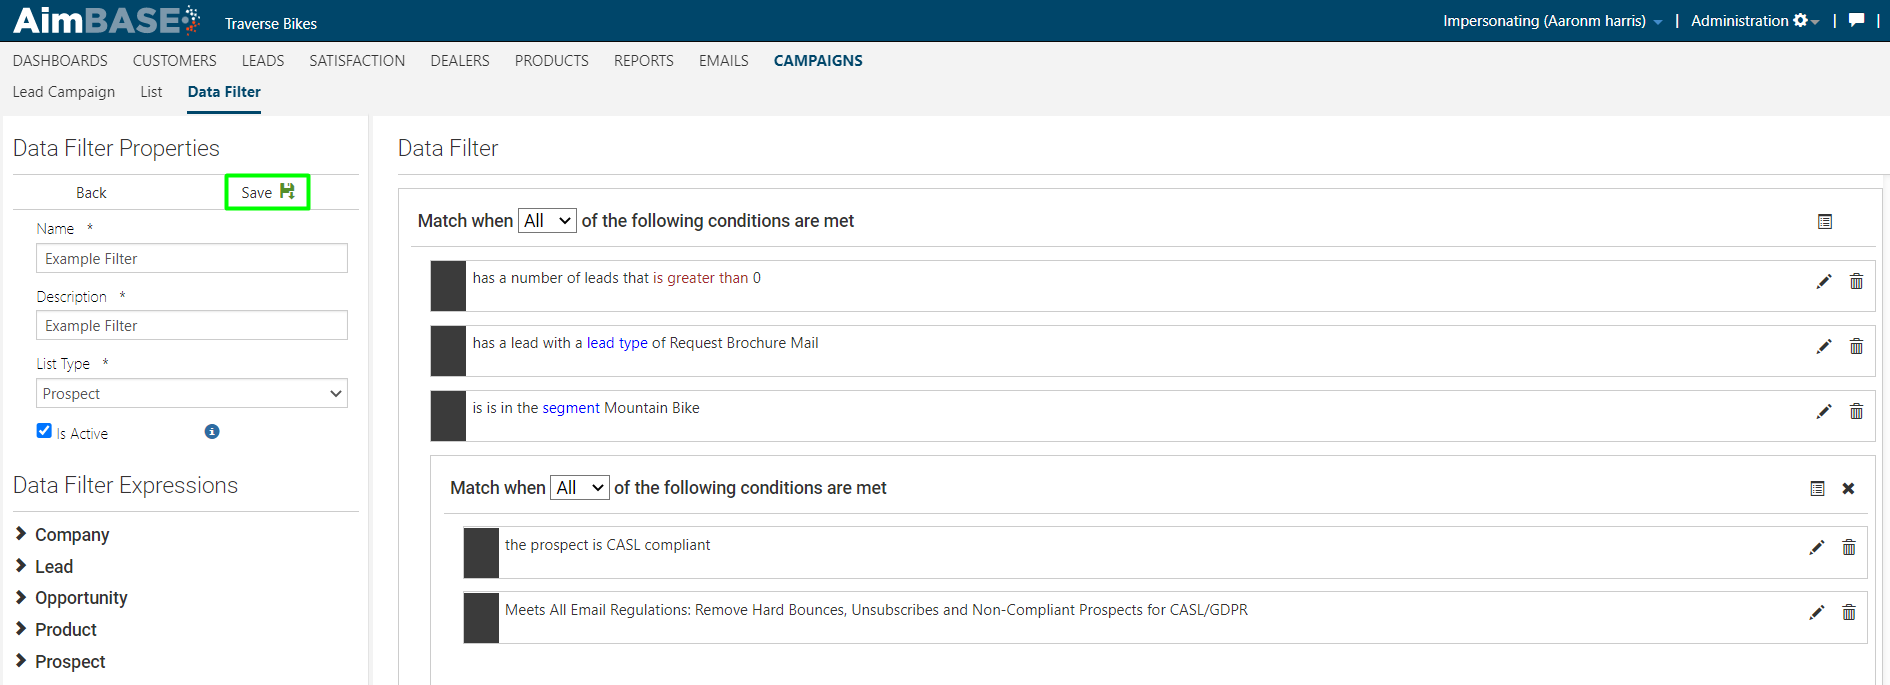
4. In the Data Filter Properties section, create a Name and Description for your data filter.
5. Select a List Type to target for your criteria. Different data types have different variables available for targeting.
If you want to send an email campaign to leads, choose Prospect from the list. If you want to send a campaign to registered owners, select Owners from the list.
6. Change the Droplist selection from “Any” to “All” for the brand level for this example, since we want all conditions to be met.
- All = all conditions must be met in order to return results
- Any = any of the conditions must be met in order to return results

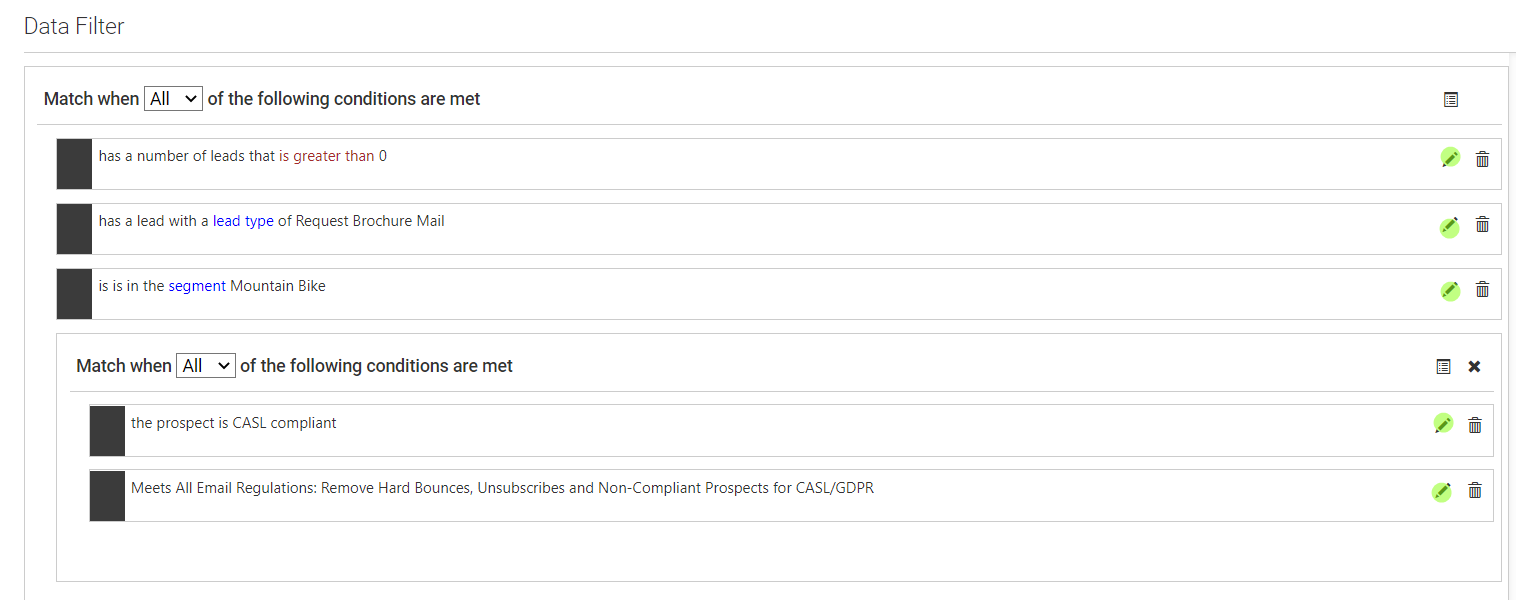
7. Begin dragging your criteria into the Data Filter portion of the screen.
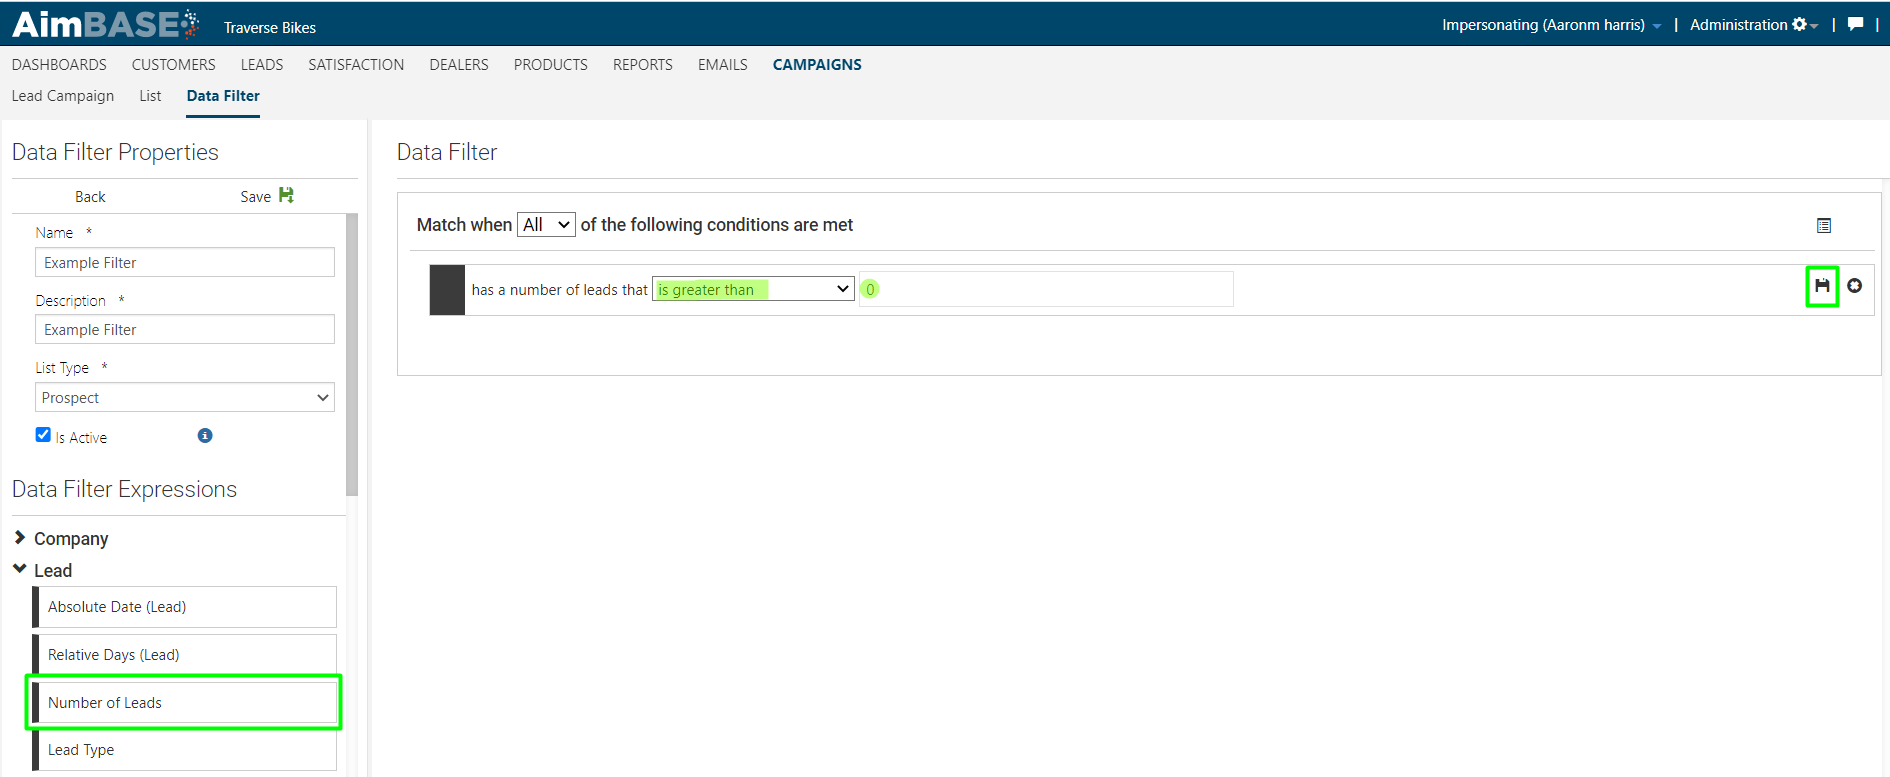
You can add as many of these are you need to identify as narrow or broad an audience as is necessary. You can also choose variables from other Data Filter Expressions within your selected list type as is show below with the addition from the Prospect. 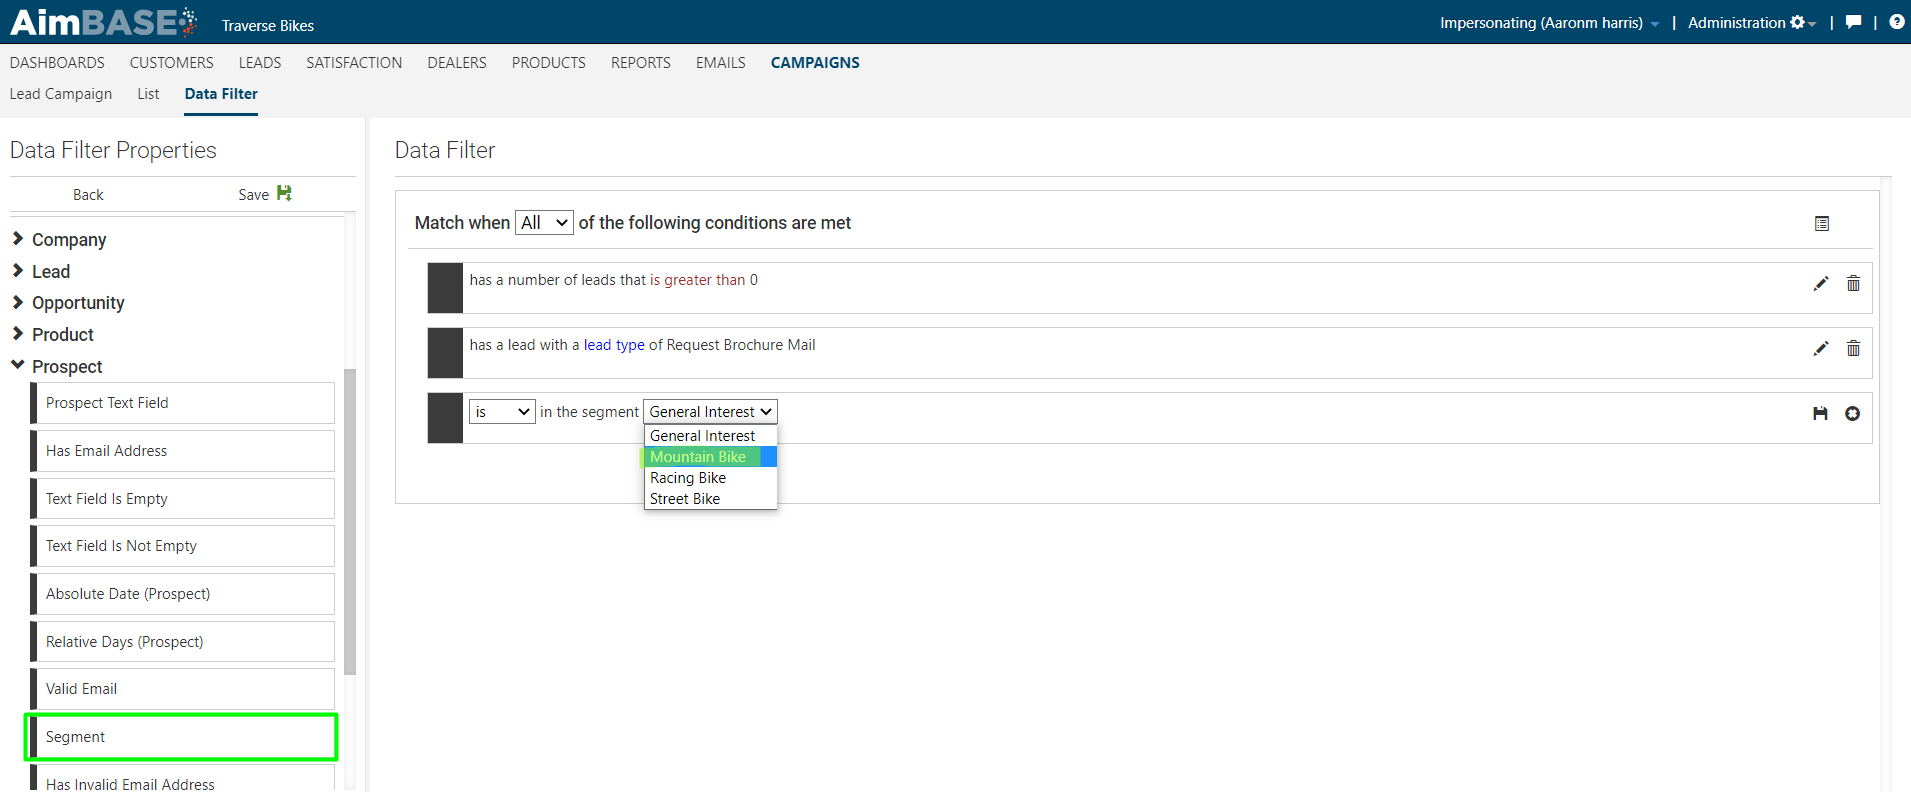
You can also create sub groupings of criteria by clicking the Add Group icon in the top-right corner of the screen.
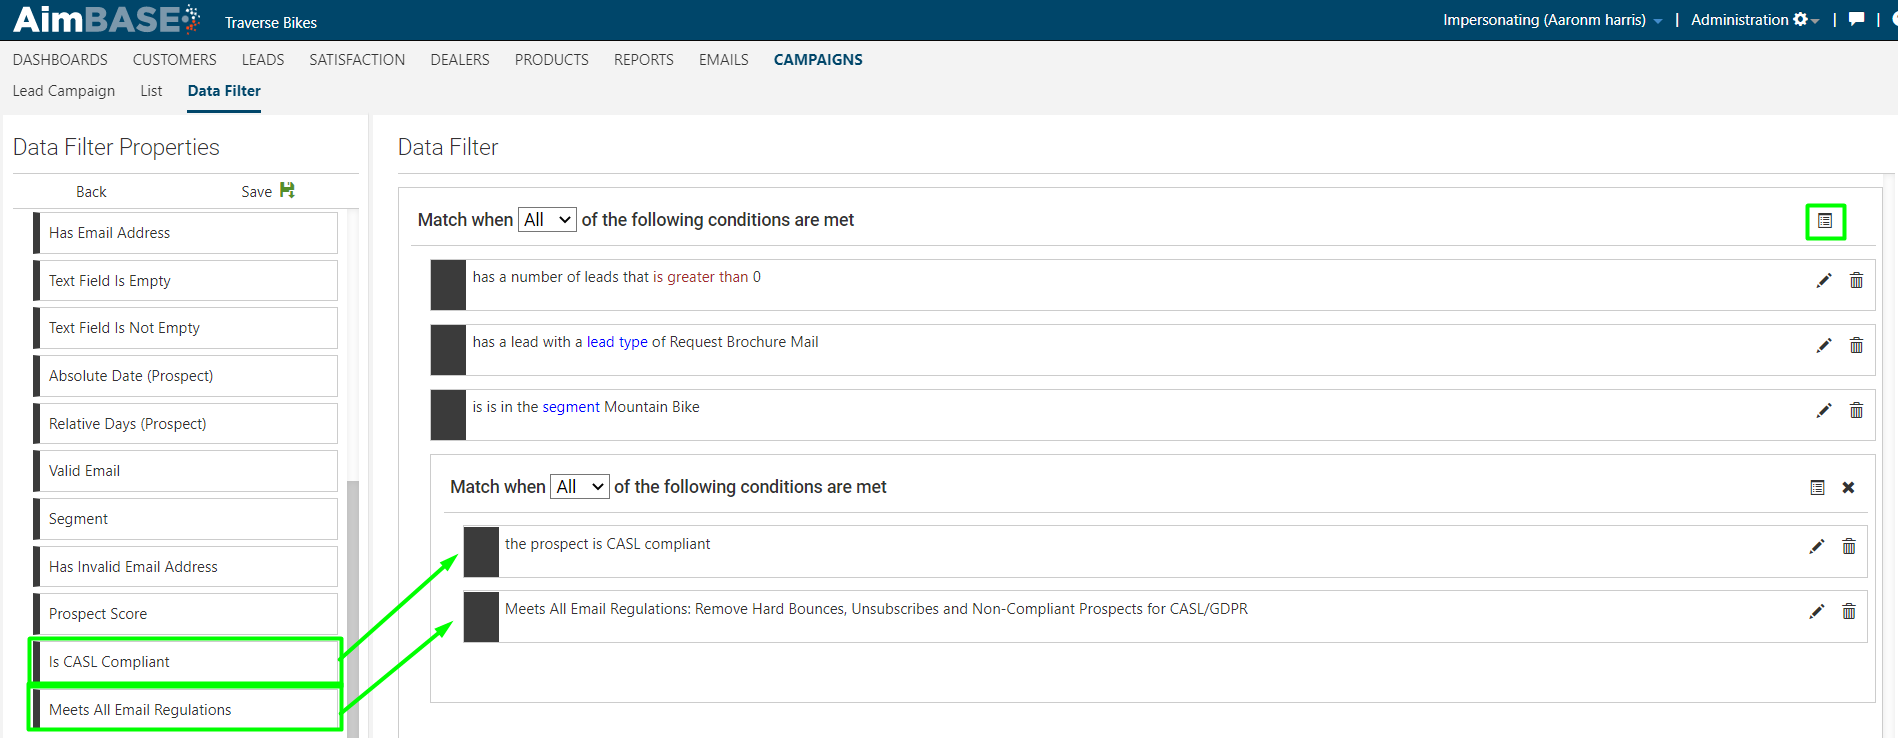
8. Ensure all of your selections have been saved by clicking the Save icon on each row. You can be sure this step has been taken if/when all icons reflect the Edit icon instead of the Save.
9. Click Save on the Data Filter.
Frequently Asked Questions (FAQs)
1. What is a data filter?
A data filter is a tool used to define specific criteria within Aimbase to identify a targeted group of individuals—such as leads, prospects, or owners. Once created, the filter can be associated with a list and used for activities like scheduled campaign sends.
2. Can I add a data filter to a list that already has subscribers?
No. If you associate a data filter with an existing list containing subscribers, the filtered results will overwrite the current list members. Data filters do not append subscribers—they replace them.
3. Do data filters automatically update the list?
No. Data filters do not automatically populate the list. The list must be manually refreshed before sending an email campaign to ensure it reflects the most current individuals who meet the criteria.
4. Can people be removed from a list when it’s refreshed?
Yes. If someone no longer meets the criteria defined in the data filter, refreshing the list will remove them. Refreshing ensures the list is always aligned with current data.
5. How do I create a new data filter?
To create a data filter:
- Navigate to Campaigns → Data Filter.
- Click Create+.
- Name and describe the filter.
- Choose the List Type (e.g., Prospect or Owner).
- Set whether all or any conditions must be met.
- Drag and drop the criteria you want to use to define your audience.
6. What should I know when building criteria for a Prospect‑based filter?
Prospects may include individuals who registered a purchased unit but never submitted a lead. If you want to target only those who have entered a lead, you must add criteria from the Lead section specifying the person has more than 0 leads.
7. What’s the difference between “Any” and “All” conditions?
- All: Every condition must be satisfied for an individual to be included.
-
Any: Individuals are included if they meet at least one condition.
These settings control how restrictive or broad your filter is.