
Introduction
Surveys are a crucial tool for gathering feedback and understanding customer satisfaction. In Aimbase, managing and interpreting survey responses is streamlined, allowing you to take proactive measures based on customer feedback. This guide will walk you through how to maximize your survey insights, navigate the responses tab, and effectively manage survey responses.
Maximizing Your Survey Insights:
Understanding and analyzing your survey responses is essential for improving customer satisfaction and refining your business strategies. Aimbase provides a comprehensive platform to manage and interpret survey data, enabling you to take proactive measures based on customer feedback. Here’s how you can make the most of the available tools and features:
Navigating the Responses Tab
In Aimbase, all survey responses are conveniently accessible under the Responses Tab. Here are the steps and features to help you navigate and utilize this tab effectively:
Survey Response Grid: This grid provides a comprehensive overview of your survey responses. Use the "Expand" option to view all available columns and gain deeper insights. Key columns include: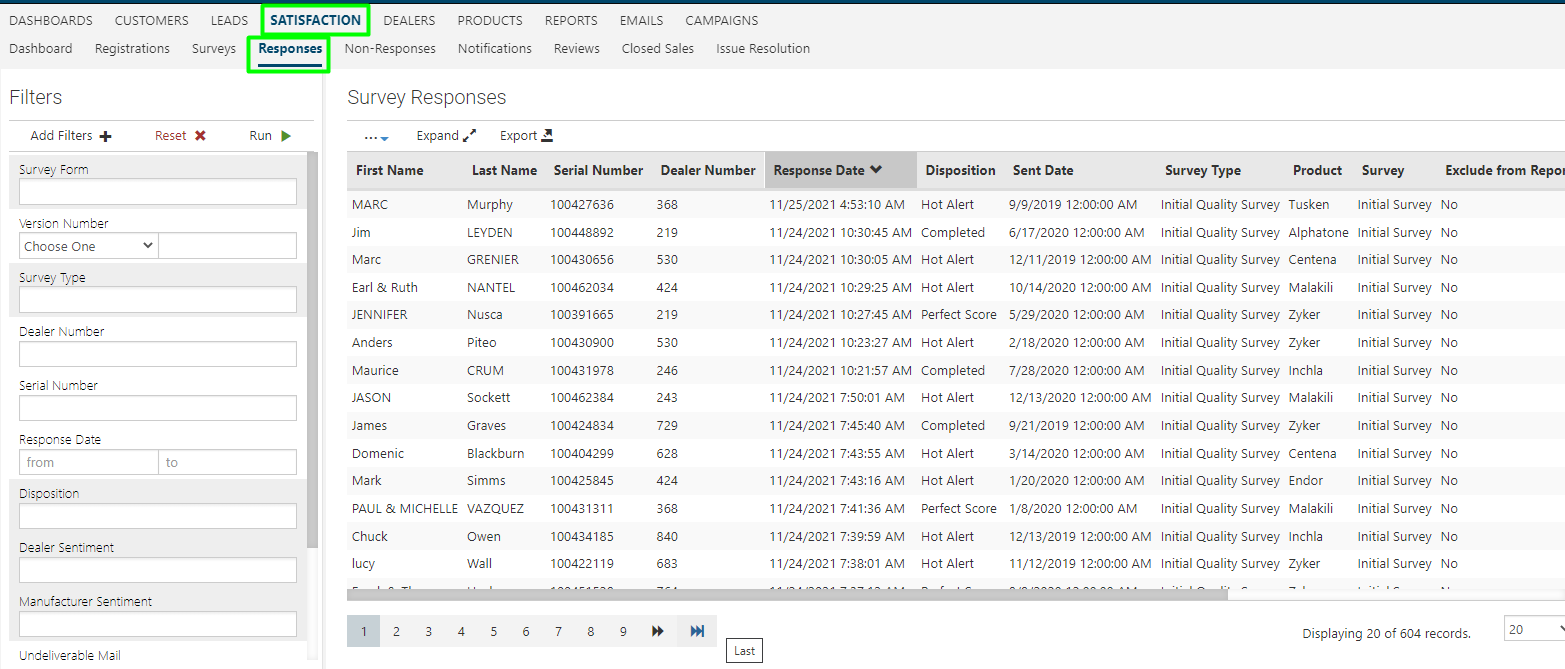
- Filters: Use Filters on the left side to find specific registrations by response date, sent date, survey type and more.
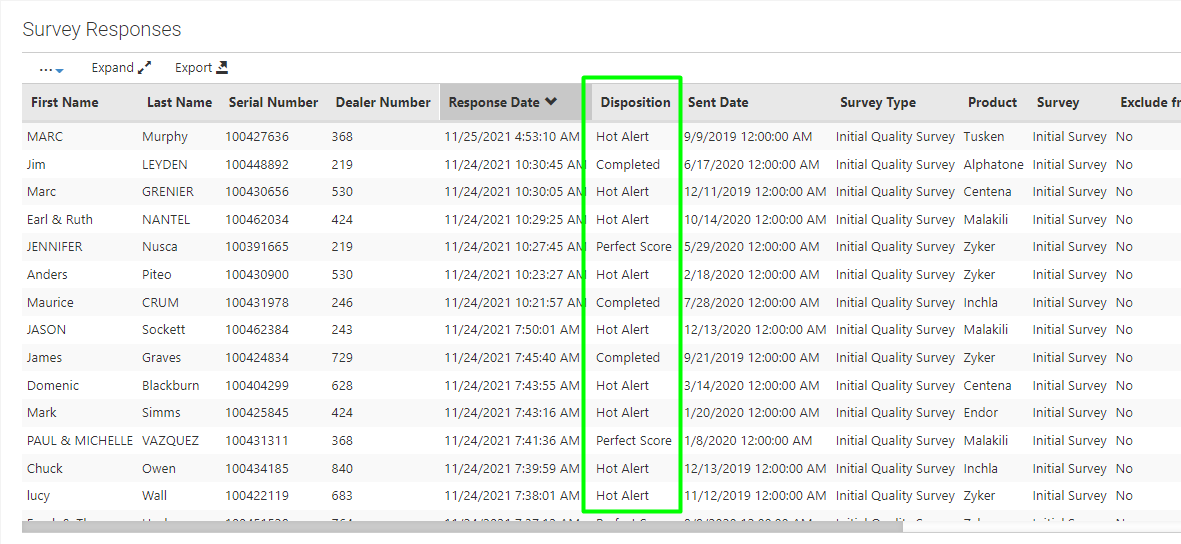
- Disposition: Shows if the survey triggered a Perfect Score, Hot Alert, or was Completed (neutral score).
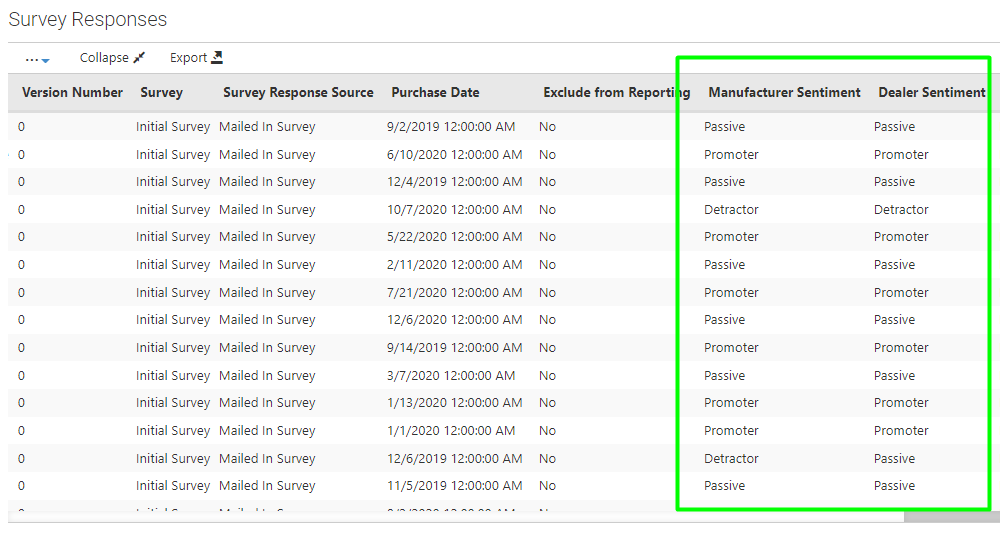
- Manufacturer Sentiment and Dealer Sentiment: Displays the NPS (Net Promoter Score) sentiment for both manufacturer and dealer.
-
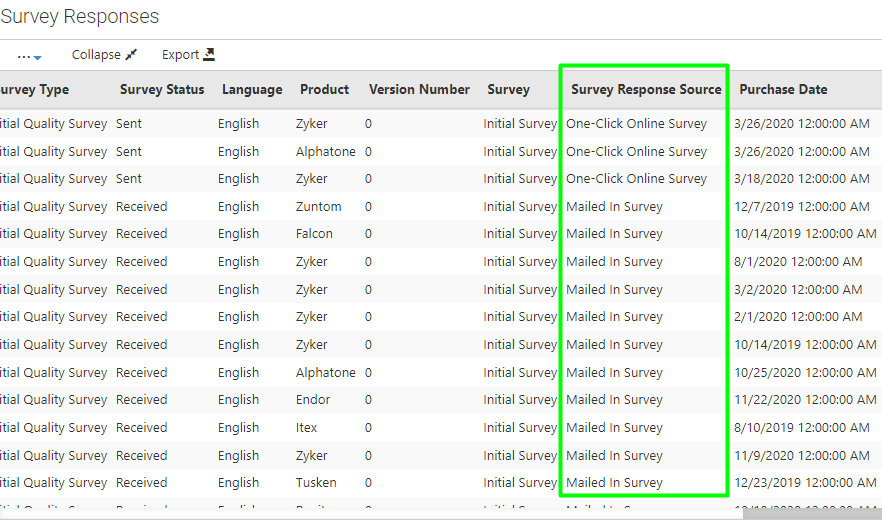
Survey Response Source: Indicates how the survey was received, such as via email invitation or mailed survey.
Digging Deeper into Responses
From the responses grid, you can view more detailed information within a survey response, allowing you to analyze individual responses to understand specific customer feedback and identify areas for improvement.
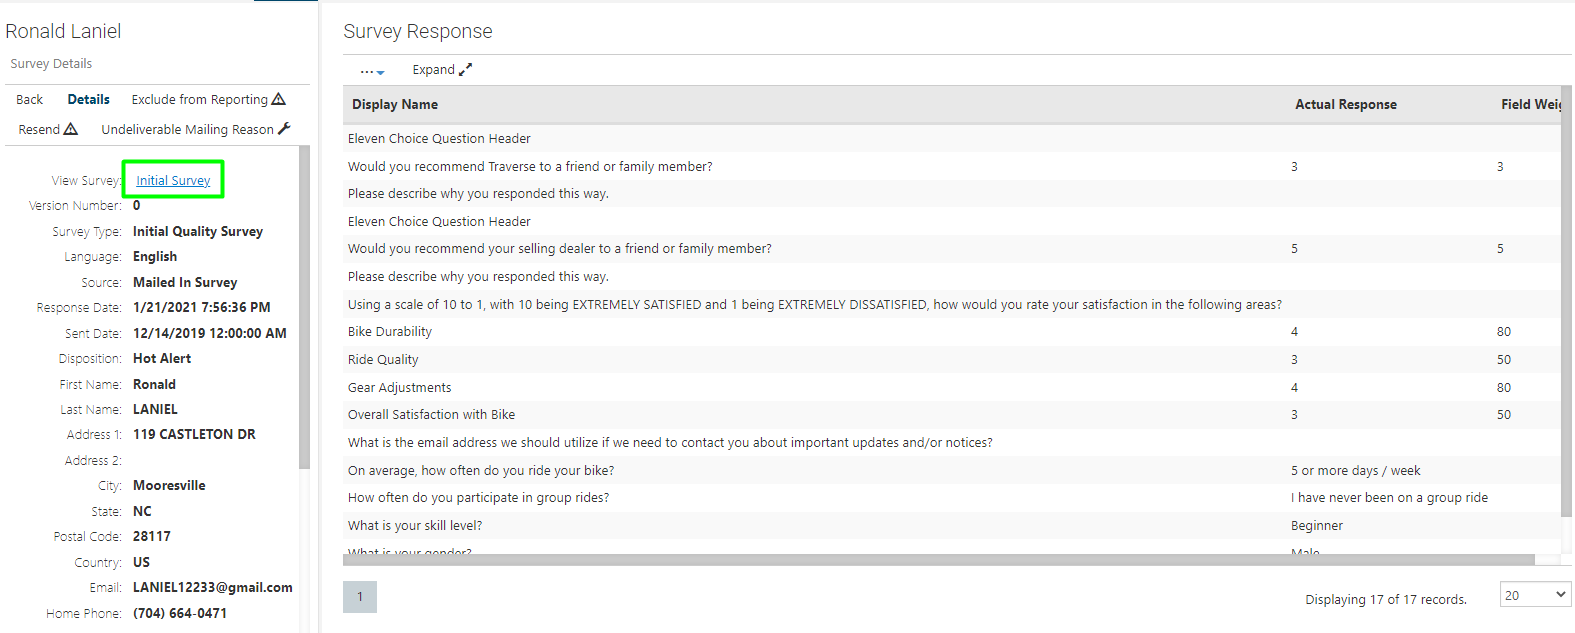
Classic Surveys
- Click on the owner within the Survey Response grid to view their response. For more detail, click on the hyperlink next to View Survey to see the full survey responses. From here, you will see a grid of each survey response that includes the question
Advanced Surveys
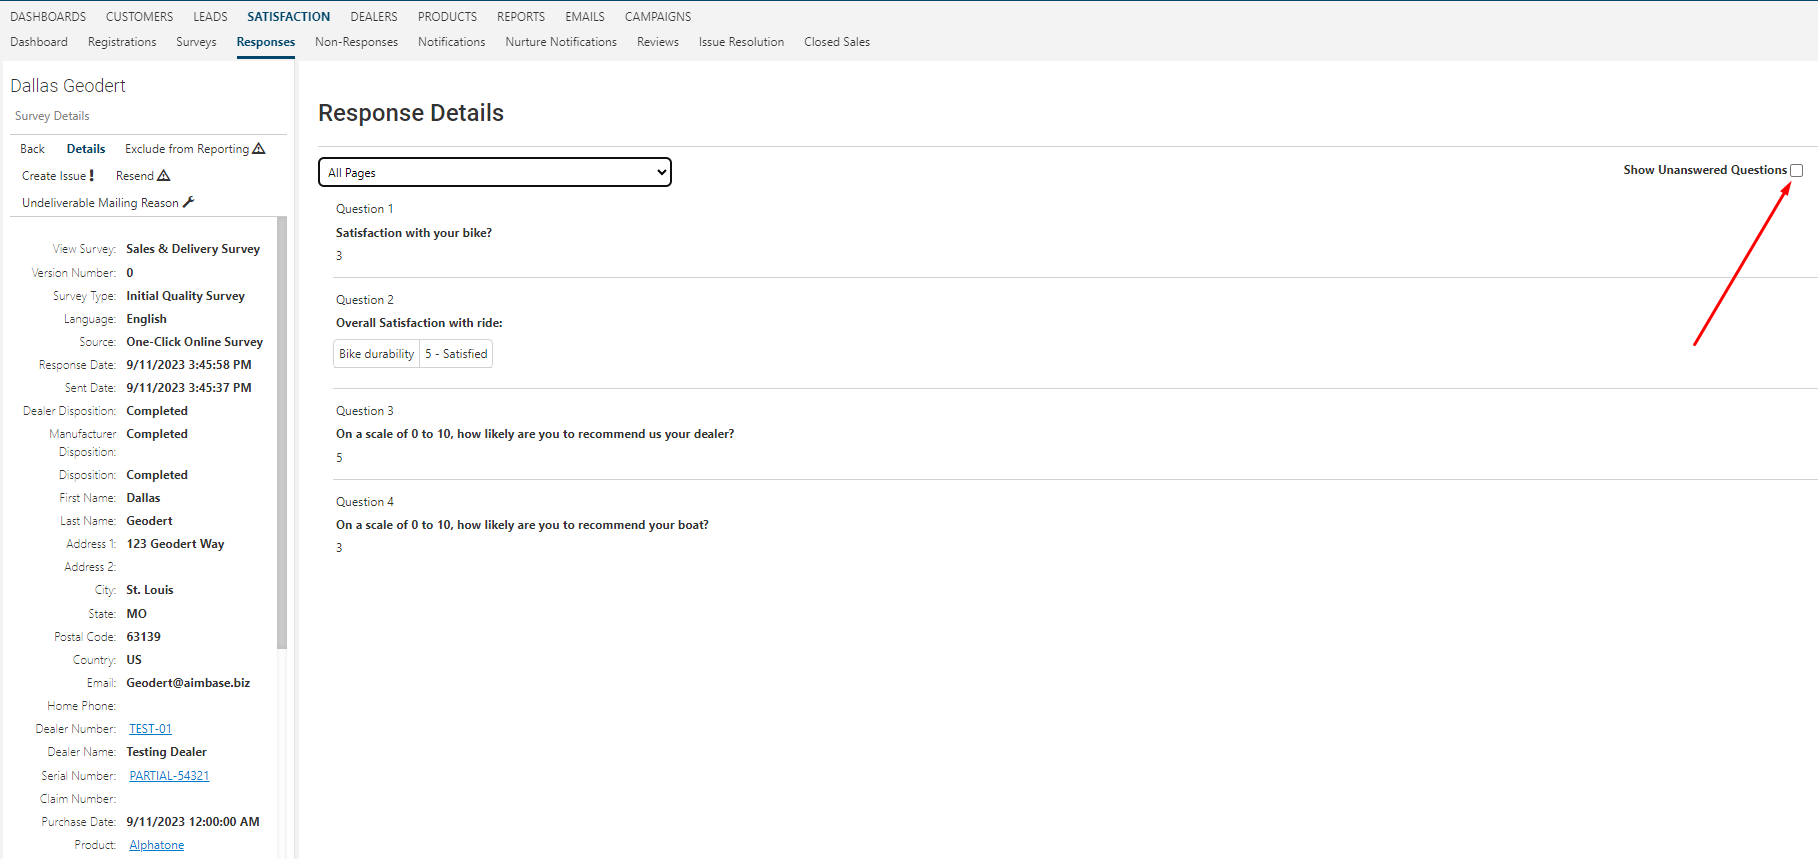
- Detailed Access: Navigate to the Responses tab under Satisfaction to access detailed survey response information.
- Filtering Responses: Click on the owner's name to examine their responses in detail. Apply filters based on survey pages to isolate specific parts of the survey.
-
Viewing Unanswered Questions: Click the checkbox in the top right corner of the response details to view any unanswered questions, providing a complete picture of the customer's feedback.
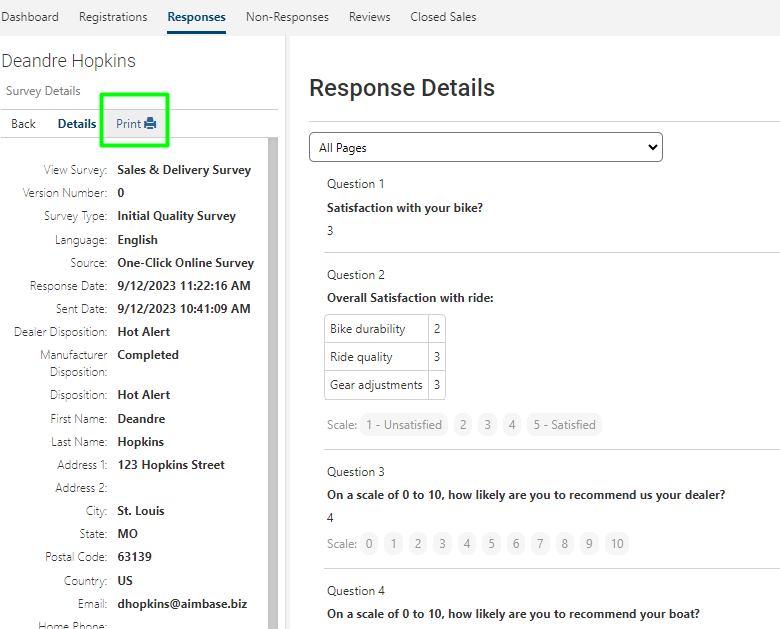
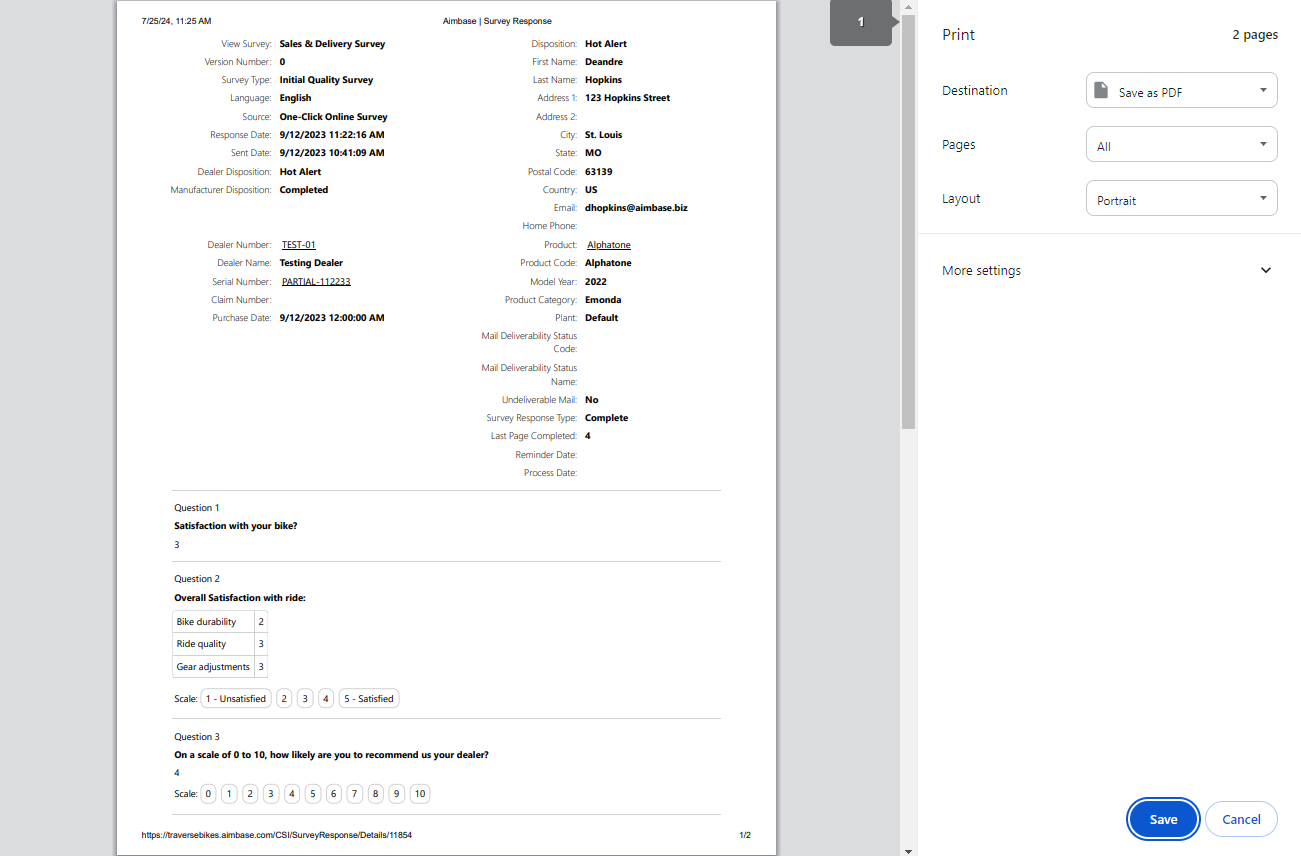
- Printing or Saving a survey response: Click the Print button to print or save the survey repsonse.
Managing Survey Responses Effectively
Non-Reporting a Survey Response:
Sometimes, a survey response might need to be excluded from reporting due to errors or other reasons. Here’s how to handle it:
1. Navigate to Responses Tab: Click into the Responses tab.
2. Filter and Select: Use filters to select the exact customer you wish to non-report.
3. Access Customer Information: Click on the customer's information.
4. Exclude from Reporting: Click on the ‘Exclude from Reporting’ tab.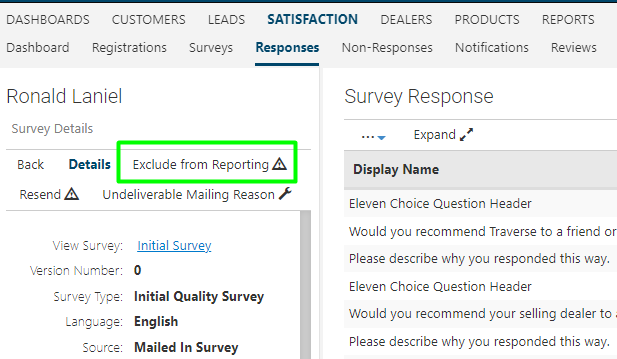
5. Provide Reason: State your reason for exclusion when prompted by the system.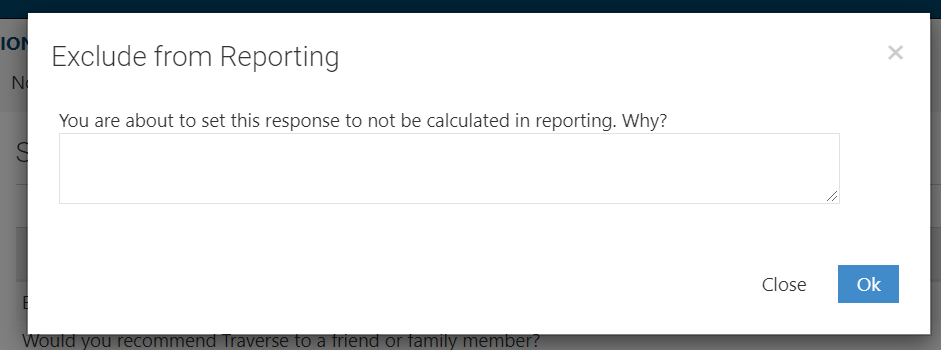
6. Confirm: Click OK to complete the process.
How to Resend a Survey:
(This functionality can be done within the Responses and Non Responses tabs, if a survey is resent from the Response Grid the original survey will automatically be non-reported)
Why? If that customer that accidentally thought the scale was reversed would like to accurately report their satisfaction with your brand, you can resend the survey so they can try again. Or if a customer’s email has changed, or if they accidentally deleted the email notification. There are options!
1. Navigate to Responses Tab: Click into the Responses tab.
2. Filter and Select: Use filters to select the exact customer you wish to resend the survey to.
3. Access Customer Information: Click on the customer's information.
4. Resend Survey: Click on the ‘Resend’ tab.

5. Set Resend Details: A box will pop up asking when you would like to resend the survey. The resend date defaults to today’s date, but you can choose a later date if needed.
6. Choose Notifications: Select which notifications to resend: Survey Invite, Reminder Invite, or Final (mailed) Invite.
7. Provide Reason: Enter the reason for the resend and click OK.

FAQ's
1. Where can I find all customer survey responses in Aimbase?
All survey responses are located in the Responses tab within the Satisfaction section. This includes access to the full Survey Response Grid, filters, disposition indicators, sentiment scores, and survey sources.
2. What information does the Survey Response Grid show?
The grid provides an overview of each survey response, including:
- Disposition (Perfect Score, Hot Alert, Completed)
- Manufacturer and Dealer Sentiment (NPS)
- Survey Response Source (email invite, mailed survey)
3. How do I filter the grid?
Filters to narrow by sent date, response date, survey type, and more
4. How can I view the full details of an individual survey response?
Click on the owner’s name in the Survey Response Grid.
For Classic Surveys:
To see the full survey, select the View Survey hyperlink, which displays a detailed grid of every answered question.
Yes. Within the response details, check the box in the upper right labeled “View Unanswered Questions” to reveal any skipped items.
5. How do I exclude (Non-Report) a survey response from reporting?
- Navigate to the Responses tab.
- Filter to find the specific customer.
- Open their record and click Exclude from Reporting.
- Provide a reason and confirm.
Note: This feature requires corporate permissions.
6. When would I need to Non-Report a survey response?
You may need to exclude a response if the customer made an error, used the wrong scale direction, or if the data is otherwise not valid for reporting.
7. How do I resend a survey to a customer?
- Filter and select the customer.
- Open their record and click Resend.
- Choose resend date (defaults to today).
- Select which notification(s) to send: Invite, Reminder, or Final.
- Provide a reason and confirm.
Note: Resending a survey may incur a per‑registration fee.
8. What happens if I resend a survey from the Responses tab?
If a survey is resent from within the Responses tab, the original response will automatically be Non‑Reported to prevent duplicate reporting.
10. What are common reasons for resending a survey?
- Customer misinterpreted the rating scale
- Customer deleted the survey email
- Issues have been resolved and the customer would like to update their survey
Resending allows the customer to provide accurate feedback.
9. Can I print or save a survey response?
- Yes. When viewing the detailed response, click the Print button to either print it or save it as a PDF.