Summary
Sending an email campaign in Aimbase is easy once you have all of the pieces setup. In this article you'll find the steps you need to take to access and complete the campaign wizard, which is the process of selecting the email, list(s), timing, etc. necessary for sending an email campaign. You'll also find information about cancelling and rescheduling a previously scheduled campaign.
Looking to send an email? You’ve come to the right place!
If this is the first campaign email you've sent within Aimbase, there are a couple of things you'll need to consider:
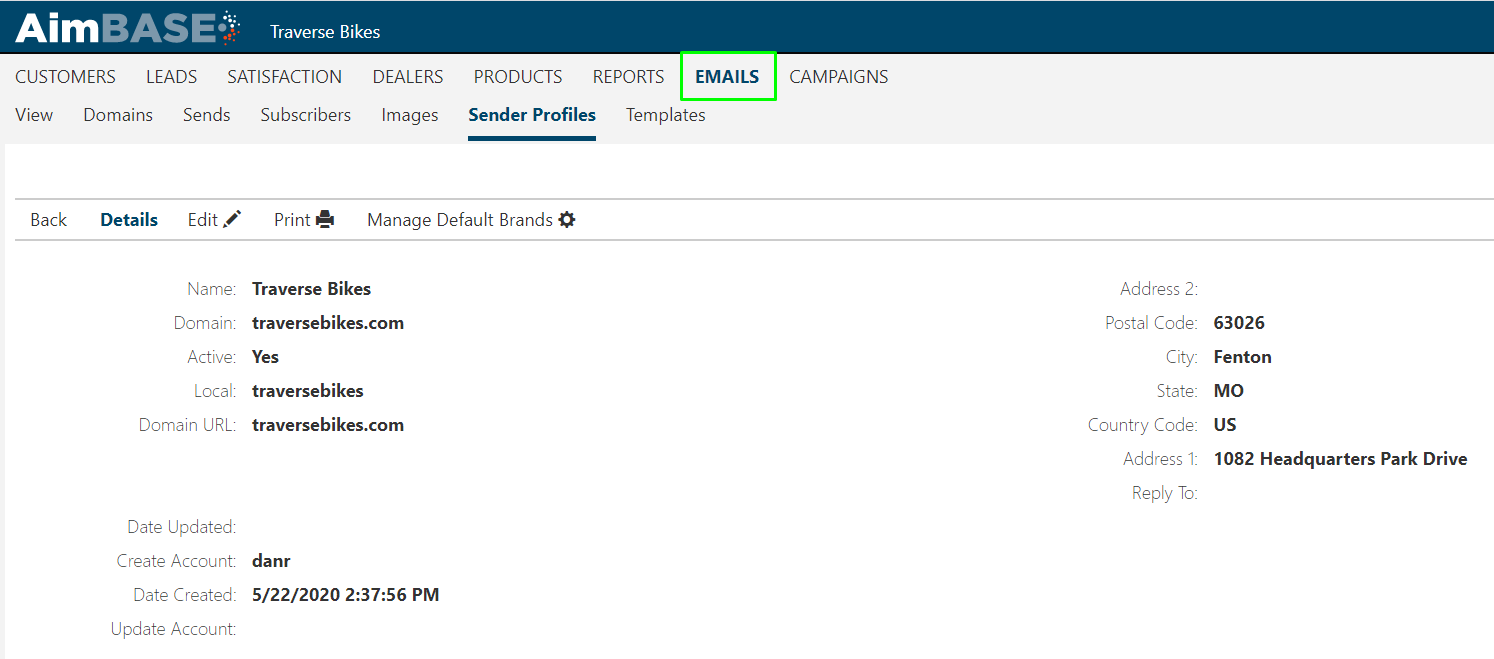
Do you have a separate sending domain setup to be used for campaign emails? To find out, click the Emails navigation, and click Create+ on the email grid. On the left side of the screen under Email Properties click the Default Sender Profile drop down. In the drop down will be the email addresses available for your install. Make sure that the options within this list have more than one domain (the value after the @ sign. If they don't you'll need to reach out to your contact at Rollick to coordinate setting up another domain.
In the example below, only one sending domain exists.

How Do You Prepare a Campaign?
Before you embark on your campaign sending venture, you will want to ensure you have completed these basic steps:
- Make sure your sender profile has the address filled out! Make sure the name, local and domain URL values all match the sender profile you plan to use on your email.
- Inclusion Lists
- Exclusion Lists (if applicable)
- Ensure your email has three components:
- Physical Mailing Address
- Unsubscribe
- View as Webpage
- Publish the email
Already done with all the set up? Skip right over those steps and go straight into sending your email!
How Do You Send a Campaign?
Now that you have prepared your lists, built and tested your email, you are ready to send your campaign! Make sure you have published all email changes.
At any time, you can exit the send wizard and start back up on it when you enter the wizard again. If you would like to preview the email, hit the icon by the name at the top of each page.
Choose Email
Navigate to the email you would like to send. Click the Envelop icon in the top-left corner.

Settings Page
On this page, you will fill out these fields:
Campaign: This is the campaign your email sends under. You can create a new one if your campaign does not exist. Be sure to remember which campaign you chose as there will be metrics for the email send on the campaign details page.
Manufacturer: Choose what manufacturer you are sending your campaign for.
Brand: By default, the manufacturer’s default brand will be selected. Click into the field and select the brand that is most relevant to the email you are sending.
Mailing Address: In your sender profile, you set up a mailing address. If you select to use the default, that is the mailing address that will be used. If you do not want to use that mailing address, uncheck the box and fill out the mailing address you would like. Please note, you have to have the Sender Address fields filled out for this field to work.
Medium*: The medium field is used as a method for capturing lead conversion data. As a best practice, this field should be used to note specifics about which email was sent. Ex: If you are sending a monthly newsletter, use June 2020 for your medium to note that it was the June newsletter that the lead converted from.
Lead Source*: This is another field that is helpful when tracking lead conversion from an email. The most common selection within this field for this use is Email.
Referrer*: Like medium, referrer can be used to capture more information pertinent to the email. Examples of additional information you could capture with this field are the name of the list you're sending to, information about targeting (i.e. was this subscriber from a trade show), or anything else that would be helpful when looking at lead data later on.
Event*: Use the event field to enter the name of an event that the email relates to.
Include in Campaign*: Check this box to ensure that the campaign and other tracking elements are appended to the URLs within your email.
*For these elements to appear on any lead conversions, your website must be capturing web session data and your lead forms must be equipped to capture data from the web session cookies.
Recipients
On this page, you will select which lists you want to send your campaign to. Your lists will be displayed in alphabetical order. You can search by list name using the search box. You can select multiple lists by checking the box next to the name.
The lists will show the active count, the last time it was updated and refreshed. If you need to add or modify a list, click the link at the bottom of the page and import your list. You will then need to hit the “Refresh Lists” button to see the changes you made to your list or the new list you updated.
Recipients Priority
Remember the attributes we talked about when testing the email? Each list has a set of attributes for the person. When you include multiple lists, and the same email is in both lists, setting the priority tells Aimbase which list’s attributes to use. Oftentimes, it is best to put your newest list as priority 1.
Exclusions
On this page, you will select which lists to exclude from your campaign. This step is not required. The lists are displayed in alphabetical order, and if you selected one to send to, you can’t exclude it from the campaign.
You would use an exclusion if you wanted to make sure a certain set of people will not get an email. For example, if you sent a campaign earlier in the day, you might exclude that list from the next campaign. Or, if you want to exclude your employees from getting a campaign email, you can upload a list of all employee email addresses and exclude that from your send.
The lists will show the active count, the last time it was updated and refreshed. If you need to add or modify a list, click the link at the bottom of the page and import your list. You will then need to hit the “Refresh Lists” button to see the changes you made to your list or the new list you updated.
Send or Schedule
This page is where you select when to send your email. You can either send it immediately, or schedule it to send in the future.
Don’t worry! If you schedule your email and need to make changes, we do have a reschedule and cancel option.
It is important to keep in mind that when scheduling your email, it takes the email and list as it is at the time of the wizard completion. If you make any updates to the list or email that you want included in the send, you will have to cancel that send and complete the wizard again.
Review
This page gives an overview of your campaign. It shows when your email will send, and for which brand. It also shows all the lists you selected. It displays what has been removed due to duplicates, bounces, and unsubscribes. It also shows how many people have been successfully excluded from the email list. You will get an idea of how many people will be receiving your email here, noting the Total Recipients at the bottom.
Keep in mind, the Total Recipient count is Aimbase’s best guess before the send. It is highly likely that there will be soft or hard bounces that we do not know about. To see the statistics of the send, you will want to visit the send message page after your campaign has sent.
Does it all look good? If not, you can navigate back to any page to make edits simply by clicking on the name in the left-hand menu. If so, it’s the moment we’ve been waiting for! Hit “Finish” to send your email!
How Do You Cancel or Reschedule an Email?
Change your mind about a scheduled email? Want to send it at a different time, or cancel it? This post will walk you through how to do just that!
Cancel or Reschedule an Email
Navigate to Emails > Sends
Select the email you would like to cancel or reschedule.
To reschedule, click reschedule and choose a different time. Please remember that any changes you have made to this email or list will not take effect if you reschedule the email. To account for copy changes in the email or list, you need to cancel the email and complete the wizard.
To cancel, click cancel on the send, and confirm. Your email has been canceled.
Monitoring Your Campaign

The Campaign Details page provides a comprehensive view of your campaign’s performance, helping you track key email delivery and engagement metrics.
Understanding Sent Metrics
The Sent Metrics table displays key email statuses. Each subscriber is counted only once in the table, based on their most recent email status. The display statuses are:
- Delivered – Successfully sent to the recipient’s inbox.
- Bounced – Unable to be delivered due to a recipient issue (e.g., invalid email).
- Failed – A delivery attempt was unsuccessful and will not be retried.
- Errored – An issue occurred preventing delivery.
- Other various statuses will appear if applicable (for example, Skipped - Bounce, etc)
Tracking Engagement Metrics
Engagement Metrics are displayed in a separate table, making it easy to track recipient interactions:
- Opened – The email was opened at least once.
- Clicked – The recipient clicked a link in the email.
- Unsubscribed – The recipient opted out of future emails.
- Spam Complaint – The email was marked as spam by the recipient.
List Details Overview
The List Details section ensures consistency in recipient data across campaign pages. This table is the same one displayed when the campaign was scheduled, providing a clear breakdown of which subscribers qualified to receive emails after Aimbase applied various checks.
It includes:
- Active Count – Total recipients eligible to receive the email after filtering.
- Duplicates – Emails removed due to duplication.
- Regulations – Recipients excluded due to compliance rules.
- Bounces – Email addresses in a bounce status that are known to be undeliverable and will not receive the email.
- Unsubscribed – Email addresses that have opted out and will not receive the email.
- Invalid Emails – Malformed or otherwise invalid email addresses that are not eligible to receive emails.
- Total Recipients – The final count of recipients after all exclusions have been applied.
This section helps you understand how your list was processed before sending, giving you full visibility into recipient eligibility.
FAQs
What is an email campaign in Aimbase?
An email campaign in Aimbase is a one‑time or scheduled email send to one or more lists of recipients. Campaigns are sent using the campaign wizard, which guides you through selecting the email, audience, tracking settings, and send timing.
What do I need before sending my first email campaign?
Before sending your first campaign, you should confirm that:
- A sender profile is fully configured, including sender name, email address, and mailing address.
- You have at least one sending domain available for campaign emails.
- Your recipient lists are set up and ready to use.
- Your email has been built, tested, and published.
Why is a separate sending domain recommended for campaign emails?
Using different sending domains for transactional emails (such as autoresponders) and commercial emails (such as campaigns and nurtures) helps protect the sending reputation of campaign emails. This improves deliverability and increases the likelihood that campaigns reach recipient inboxes.
What lists can I send a campaign to?
You can send a campaign to one or multiple inclusion lists. Lists are displayed alphabetically, and you can search by name. Aimbase also allows you to apply exclusion lists to prevent specific audiences—such as employees or recently emailed subscribers—from receiving the campaign.
What happens if the same recipient appears in multiple lists?
If a recipient exists in more than one included list, Aimbase removes duplicates automatically. When multiple lists are used, recipient priority determines which list’s attribute data is applied to the email personalization.
Can I make changes after scheduling an email campaign?
If a campaign is already scheduled:
- Rescheduling the send will change the delivery time, but it will not include any updates made to the email or lists.
- To include changes to email content or list membership, you must cancel the scheduled send and complete the campaign wizard again.
Can I cancel a campaign after it has been scheduled?
Yes. Scheduled campaigns can be canceled from Emails > Sends. Once canceled, the email will not be sent. Ensure you receive the email from Aimbase confirming that the cancellation was completed.
What does the Review page in the send wizard show?
The Review page summarizes your campaign setup, including:
- Scheduled send time
- Selected brand
- Included and excluded lists
- Recipients removed due to duplicates, bounces, unsubscribes, or regulations
- An estimated total recipient count
This allows you to confirm campaign details before sending.
Why might the final send count differ from the previewed total recipients?
The Total Recipients number shown before sending is an estimate. After the send, some recipients may still result in soft or hard bounces that were not previously known. Final delivery results are available on the send message and campaign details pages.
Where can I monitor campaign performance?
Campaign performance is monitored on the Campaign Details page. This page provides visibility into delivery status, engagement metrics, and list processing results.