
Can't an email recipient opt-out of emails sent from Aimbase at any time? Yes! Often times recipients simply prefer to hit reply on an email and ask you to do it for them, assume a reply stating, “Unsubscribe” will achieve the same result or just don't understand how to complete the unsubscribe process. In this article we'll address several ways in which you can help your customers and audience unsubscribe from your emails.
One other important factor to consider is whether or not the recipient is a Prospect within Aimbase or only a ‘List’ member. If someone is a Prospect, the person likely has entered a lead or purchased your product previously. Prospects can be opted out of emails from their prospect timelines. If an email recipient is only a List member, then opting them out from the Prospect timeline isn't an option. This scenario can occur if you have a standalone opt-in form that does not create a lead in Aimbase (for example, a Newsletter opt-in box) and/or if you've imported a list of email addresses to the List section of Aimbase. We have solutions for this scenario also.
NOTE: The difference between the Leads Grid and Prospect Grid is that a Prospect can have multiple leads. Also keep in mind that if a registration is not successfully matched to a lead, it will create a prospect, therefore there could be Prospects with only an owner record.
Unsubscribing ‘Prospects’
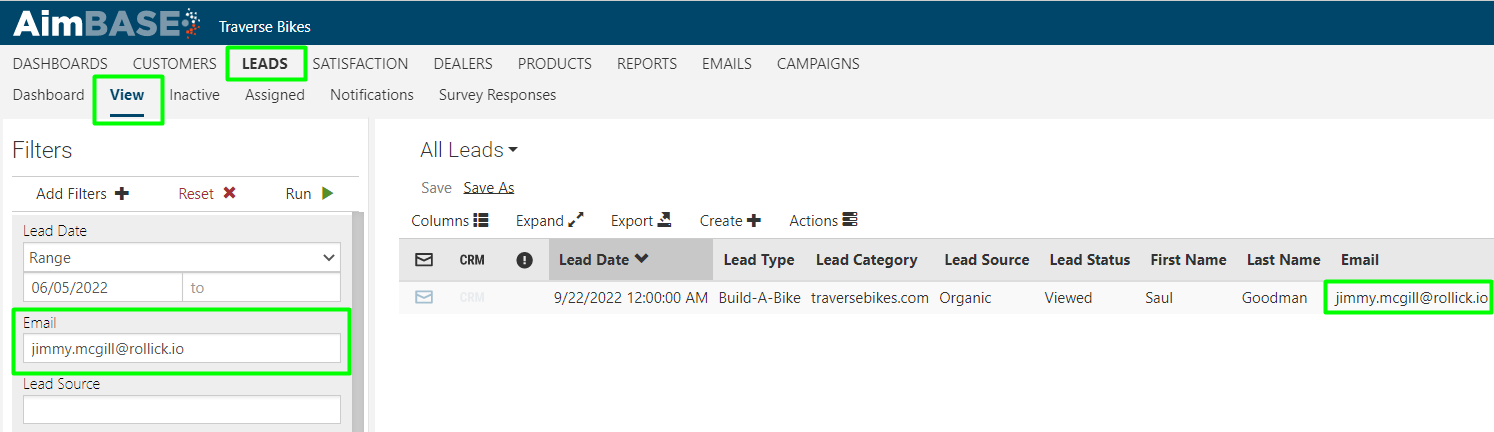
1. Access the prospects timeline. Do this by searching for the ‘email’ address you wish to unsubscribe on either the ‘Leads’ grid or the ‘Prospect’ grid.
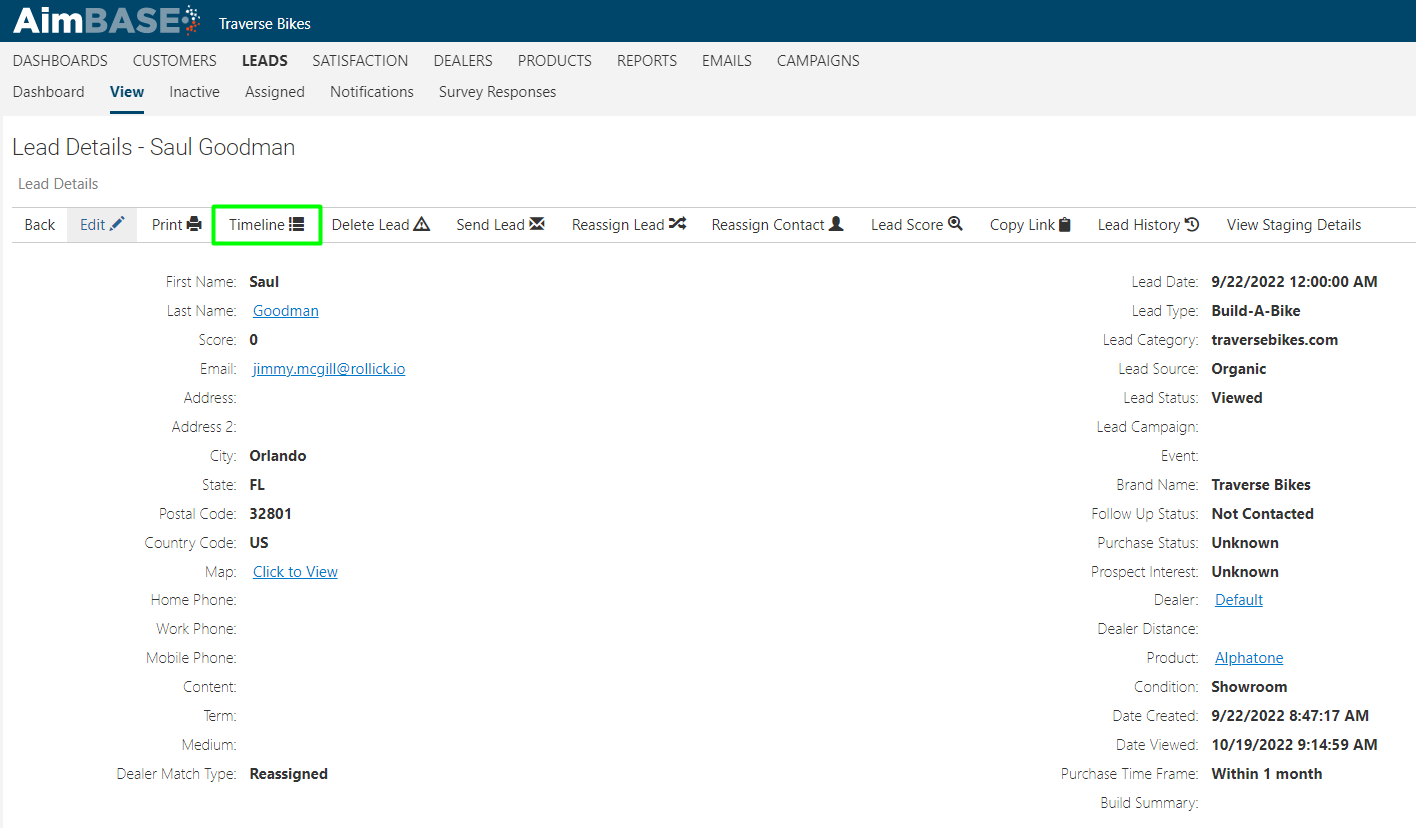
2. Select the record, and click on ‘Timeline’.
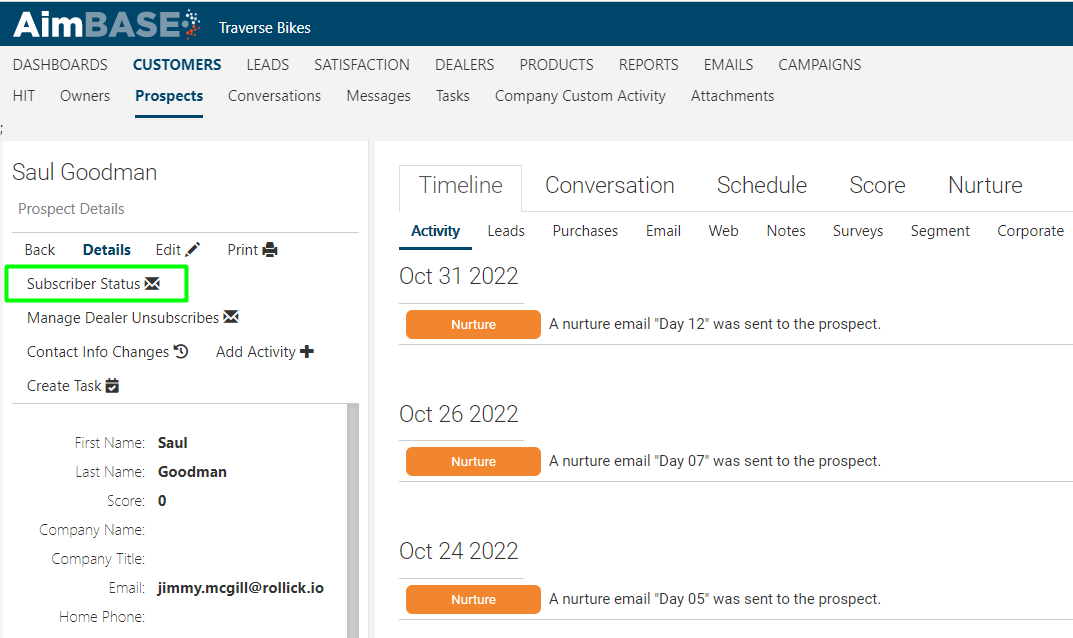
3. Once on the prospect's timeline, click the ‘Subscriber Status’ icon on the top-left.
4. In the popup window, select the dropdown next to the brand(s) you'd like to unsubscribe the prospect from and select ‘Unsubscribe’ and click ‘OK’
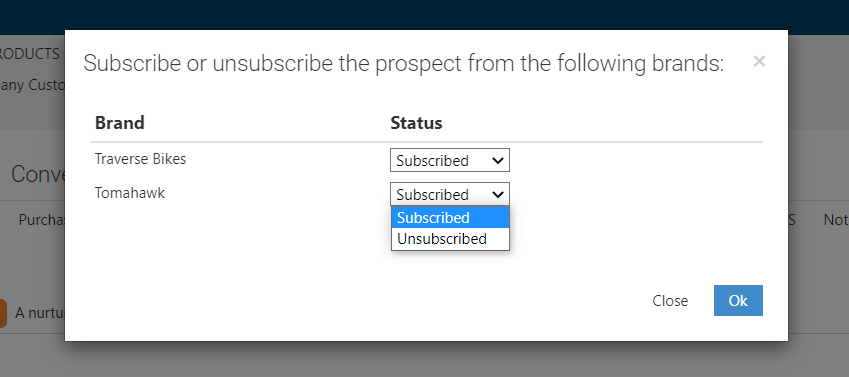
PRO TIP: When you unsubscribe from the prospect timeline, any email sent that is associated to the brand(s) will unsubscribe the prospect from that brand. Every email sent from Aimbase gets associated to a brand. Prospects will only receive emails for brands which they are subscribed to regardless of what lists they may appear within.
Deactivating ‘List’ Members
1. Locate the email address which you want to unsubscribe on the list for which you want it removed. Lists are stored under ‘Campaign’. Select the list.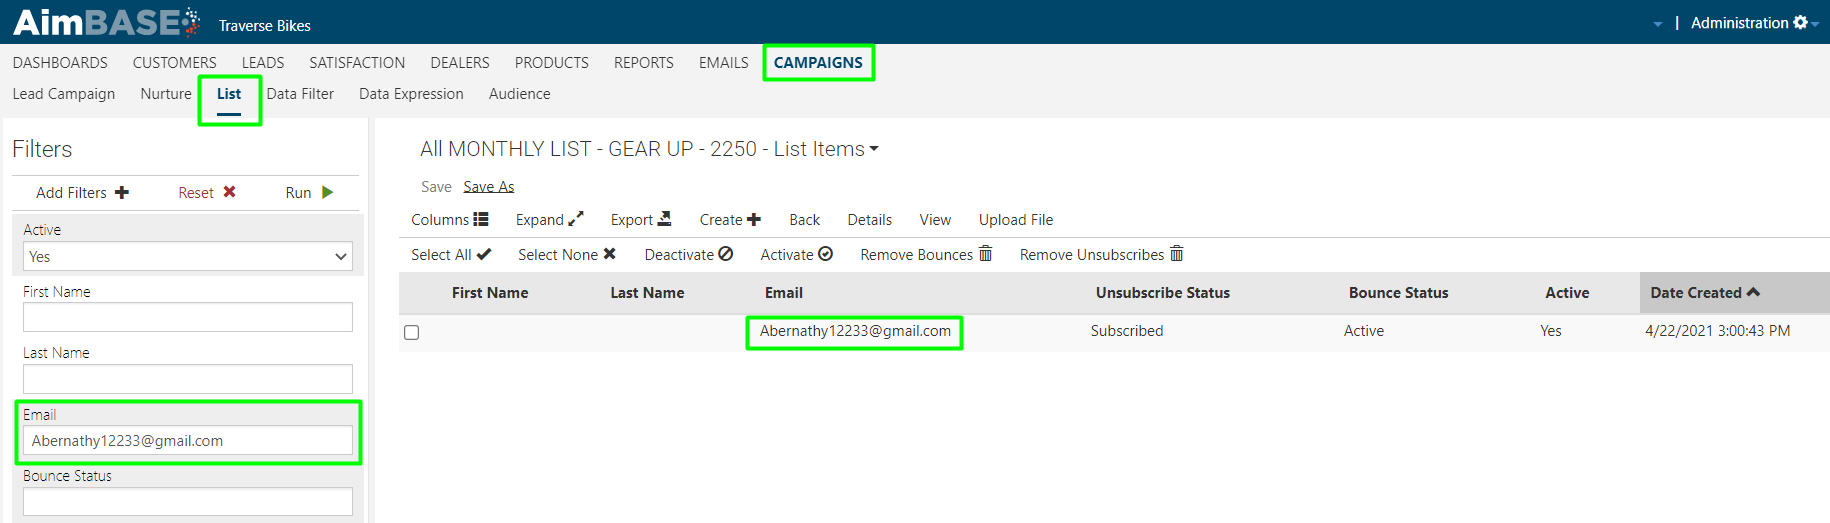
2. Once you've located the email address on the list, check the box in that row with the email address and then click ‘Deactivate’. This will deactivate the email address from the list to prevent the person from receiving emails sent to this specific list again.

PRO TIP: Deactivating an email address from a list differs from Unsubscribing because it is list-specific v. brand specific. This means if an email address is opted-in for Brand A and an email is sent about Brand A to a list the email address appears on, the email address will receive the email. If that email address is deactivated from the list but the email address is scheduled to receive a nurture email about Brand A or an email is scheduled to send to a different list that this email address is on, the email address will still receive the email because overall it is still subscribed to emails about the brand.
Unsubscribing From a Send
Another option for unsubscribing email recipients is to do it via the same experience they would (i.e. from an email they previously received). To do this, follow the steps below.
1. Navigate to the ‘Subscribers’ grid, nested under ‘Emails’ and use the email address filter on the left to find emails that were sent to the email address.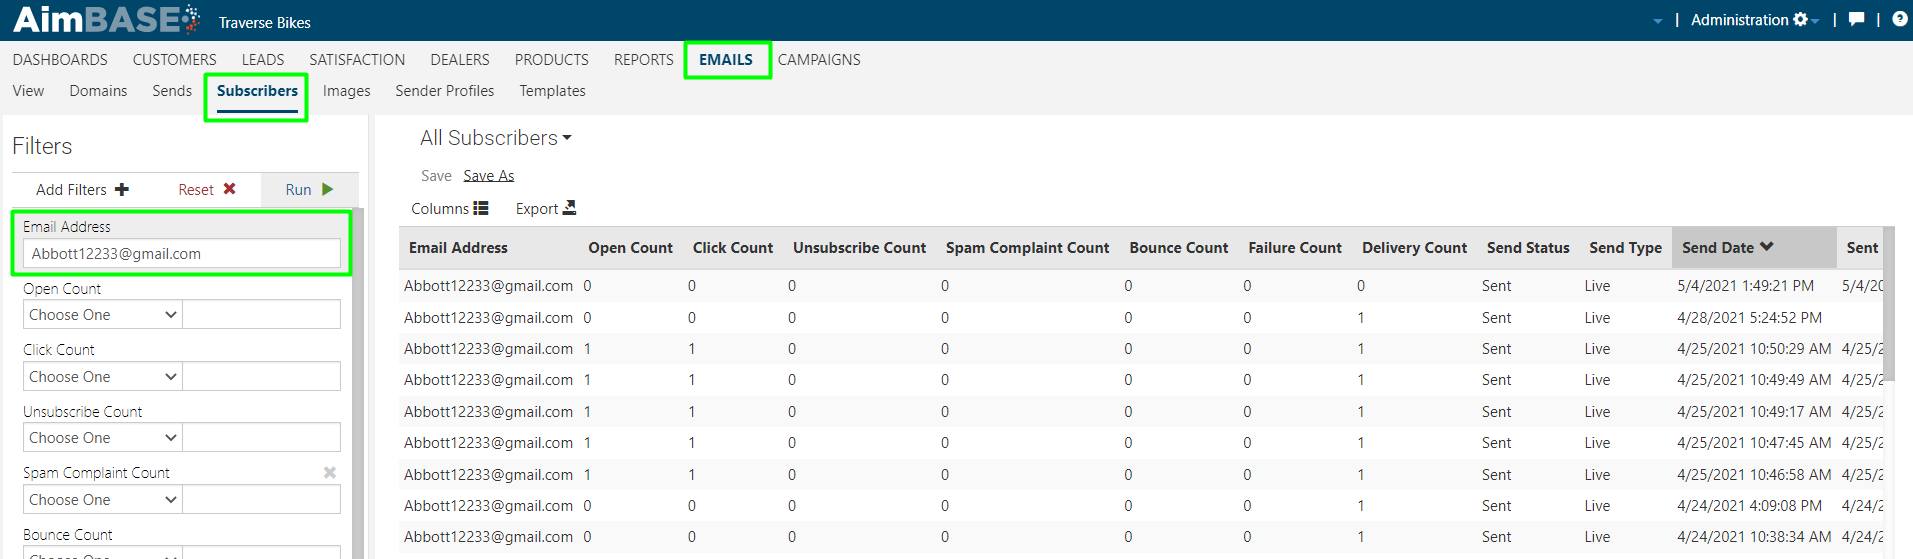
2. Select any row to see the detail of the email sent. Click ‘Preview Email’ on the detail page.
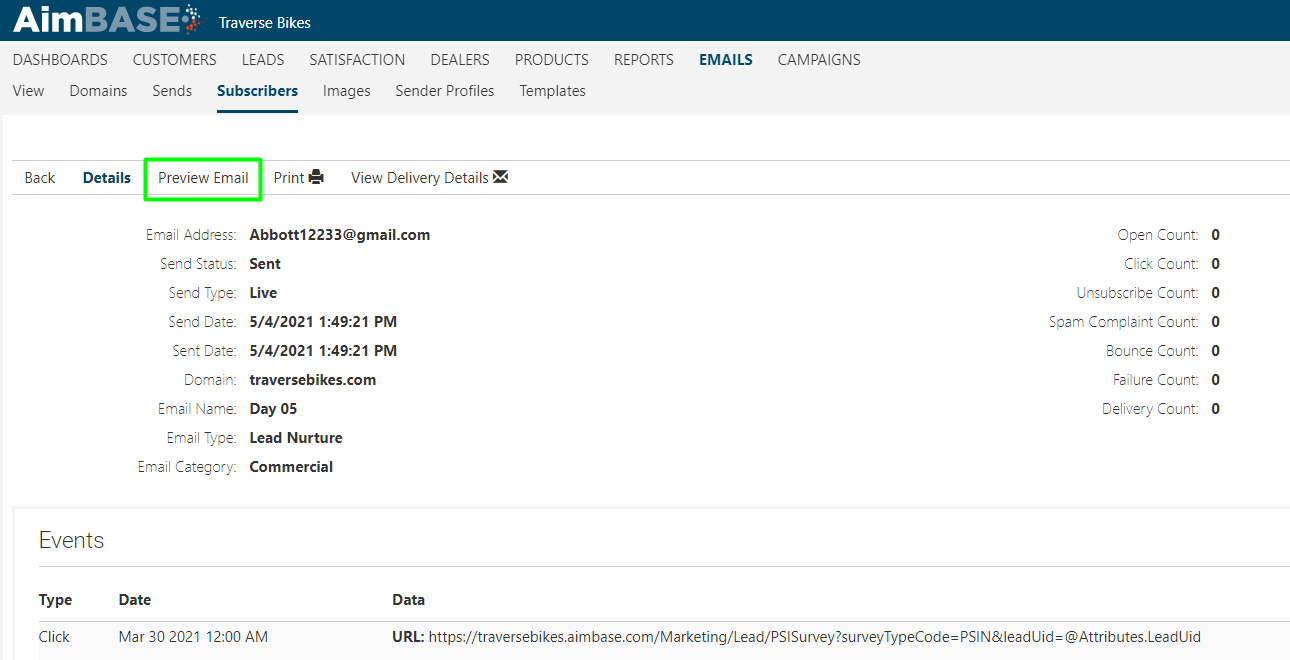
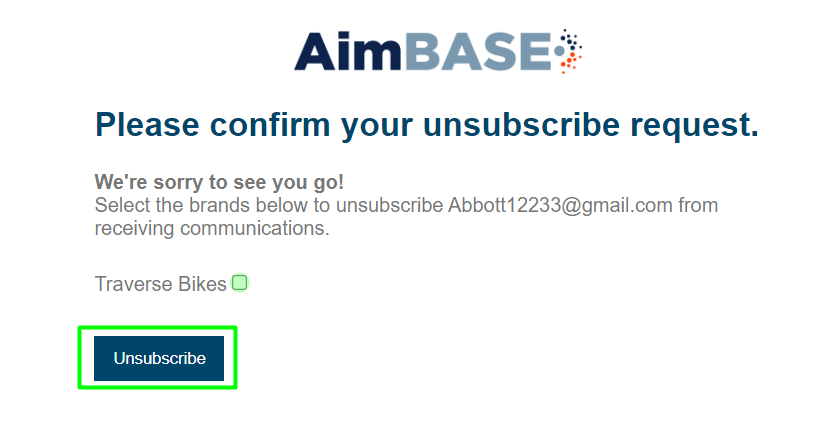
3. Wait for the email preview to load within a new tab. Locate the Unsubscribe link within the email.
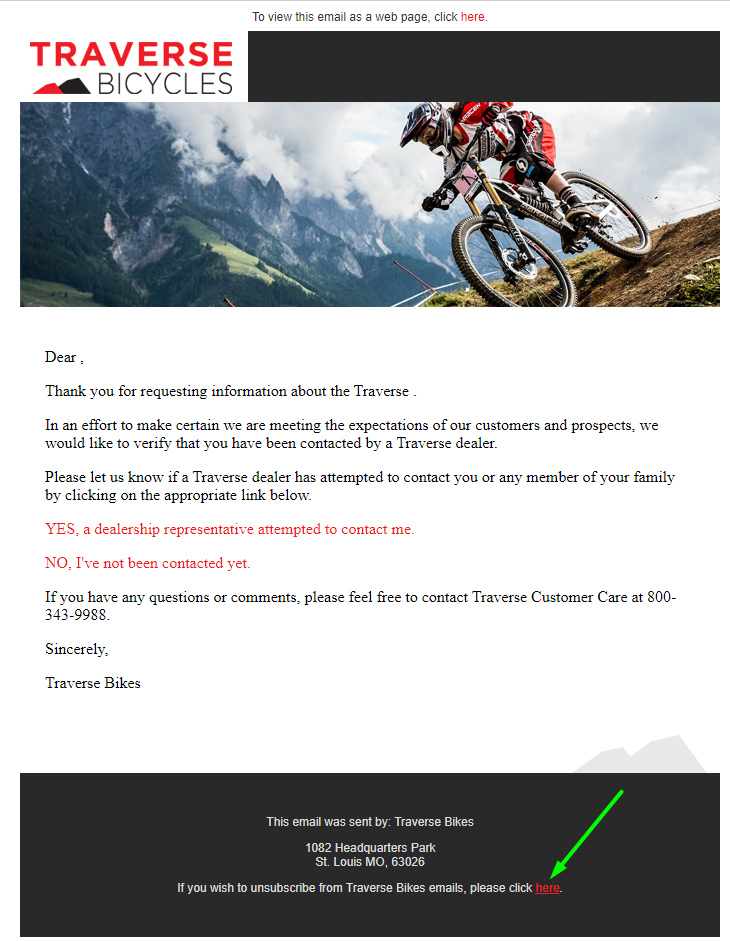
4. Click the link. Once the subscriber preferences page loads, choose the settings for the recipient. Check the box of the brand you'd like to unsubscribe them from and click ‘Unsubscribe’.
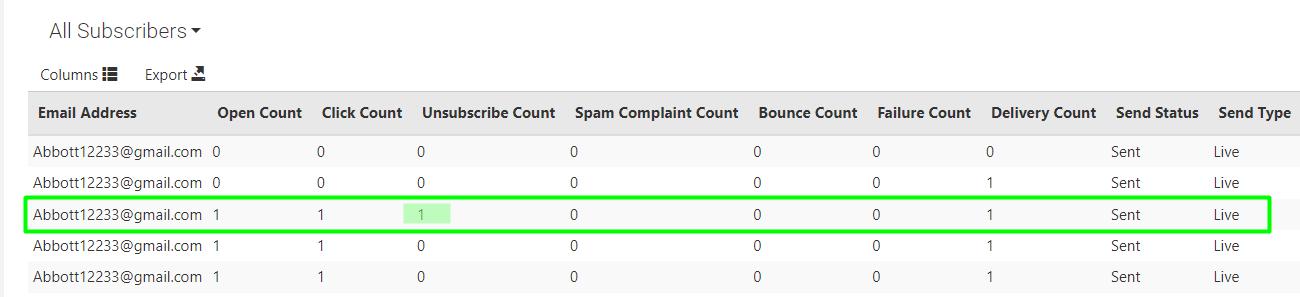
5. Confirm your unsubscribe was successful by looking at the email send (i.e. the row you click into) back on the grid and note the count of 1 that will now appear within the ‘Unsubscribe Count’ column.
a { text-decoration: none; color: #464feb; } tr th, tr td { border: 1px solid #e6e6e6; } tr th { background-color: #f5f5f5; }
Frequently Asked Questions
What is the difference between unsubscribing a Prospect and deactivating a List member?
Unsubscribing a Prospect is brand-specific and prevents that person from receiving emails associated with the selected brand. Deactivating a List member is list-specific and only prevents the recipient from receiving emails sent to that particular list.
How do I know if someone is a Prospect or only a List member?
A Prospect typically has entered a lead, made a purchase, or otherwise has a prospect record within Aimbase. A List member may only exist on a marketing list, such as a newsletter signup list or an imported email list, and may not have a corresponding prospect record.
Will unsubscribing a Prospect remove them from all email communications?
Not necessarily. Prospects are unsubscribed at the brand level. If they remain subscribed to other brands, they can still receive emails associated with those brands.
If I deactivate someone from a list, can they still receive emails?
Yes. Deactivating a List member only stops emails from being sent to that specific list. If the person is still subscribed to the brand and appears on other active lists or is receiving automated brand-related emails, they may continue to receive communications.
Can I unsubscribe someone even if they didn't use the unsubscribe link?
Yes. Administrators can manually unsubscribe recipients by updating their Subscriber Status from the Prospect Timeline or by using the unsubscribe link within a previously sent email on the subscriber's behalf.
How can I verify that an unsubscribe was successful?
After unsubscribing through a previously sent email, you can review the email send record in the Subscribers grid and confirm that the Unsubscribe Count has increased for that email send.
Why can't I find an email address in the Prospect grid?
Not all email recipients have Prospect records. If the email address only exists as a List member, you will need to locate it within the appropriate list under Campaigns and deactivate it there instead.
Does being removed from a list automatically unsubscribe someone from a brand?
No. List deactivation and brand subscriptions are separate. Removing or deactivating an email address from a list does not change that person's subscription status for the associated brand.
Can a recipient manage their own email preferences?
Yes. Every marketing email sent from Aimbase includes an unsubscribe link that recipients can use to manage their subscription preferences and opt out of specific brand communications.
Why might a Prospect exist without a lead?
If a registration or activity cannot be matched to an existing lead, Aimbase may create a Prospect record containing only an owner record. This means some Prospects may exist even though they do not have associated lead records.
What happens if a Prospect belongs to multiple lists?
A Prospect's ability to receive emails is ultimately determined by their subscription status for the associated brand. Even if they appear on multiple lists, they will only receive emails for brands to which they are currently subscribed.
Should I unsubscribe or deactivate?
As a best practice:
- Unsubscribe when the recipient no longer wants emails for a specific brand.
- Deactivate when you want to remove the recipient from a particular marketing list while leaving their overall brand subscription preferences unchanged.